
9. Place Annotation and Hatch Closed Areas (AutoCAD Foundations)
Now that we know how to create and organize objects, let's start adding information to these objects through text annotation and hatches.
The following video demonstrates some of the learning objectives covered in this topic:
Learning Objectives
Prerequisites
You should know how to do the following before continuing:
Prepare for the Exercises
To follow along with the exercises in this topic, download the ZIP file containing the sample drawings.
![]() Download: Sample drawing files used for the following exercises
Download: Sample drawing files used for the following exercises
The ZIP file contains all drawings used for the exercises and only needs to be downloaded once. Keep the ZIP file to restore the original state of the sample drawings.
Set a Text Style as Current
Every text object in a drawing has a text style associated with it. Text style includes the font, font style, size, height, effects, and alignment of text.
When you enter text, the current text style is applied.
Try It: Set a Text Style as Current
In this exercise, set up your text style.
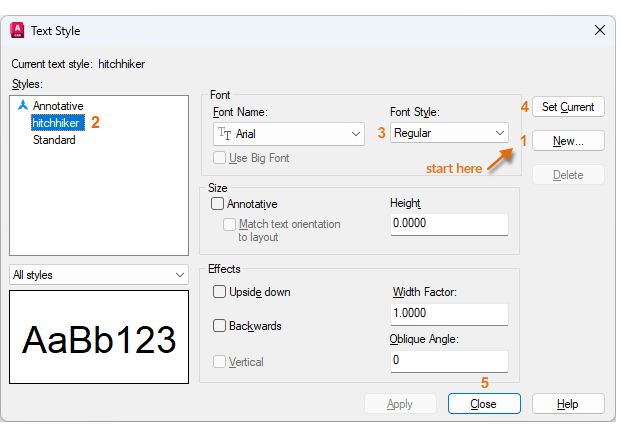
From the ribbon, click Home tab > Annotation panel > Text Style. Or enter STYLE at the Command prompt.
In the Text Style dialog box that opens, check and make any changes to the current text style. Note that if you change an existing style’s font, all text in the drawing that uses that style is regenerated using the new font.
To set it as the current text style, click Set Current and then Close.
Custom text styles can be created. Once you’ve created a style, you can modify its settings, change its name, or delete it when you no longer need it.
Try It: Create a New Text Style
In this exercise, create a new text style.
In the Text Style dialog box, click New....
In Style Name, name your new text style.
Specify font, font style, and any other size and effects settings.
Click Set Current.
Click Close.
Place Multiline Text
Once you've established a text style, you can now create several paragraphs of text as one multiline text object. The built-in editor also allows you to format text appearance, columns, and boundaries.
Try It: Create Multiline Text Objects
In this exercise, add multiline text to your drawing.
From the ribbon, click Home tab > Annotation panel > Text > Multiline Text. Or enter MTEXT at the Command prompt.
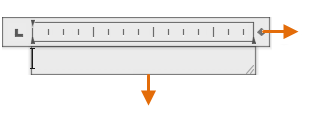
Click two points to determine the width of the text object. The size of the text box isn't permanent. After you specify the text box, the in-place editor is displayed. Here, you can easily change the length and width of the text box before, during, or after typing the text.
In the text box, type your text.
Highlight a word and click some of the formatting options. These options are similar to those in most word processing applications.
To exit the text editor after you finish entering the text, click anywhere outside it. Or click Close Text Editor on the ribbon.
Try It: Modify Existing Multiline Text
In this exercise, edit multiline text.
Double-click the text object.
Highlight words or the entire paragraph and click on the options in the Formatting tab.
Click anywhere outside the text object to exit the text editor. Or click Close Text Editor on the ribbon.
Apply Hatch Patterns and Fills
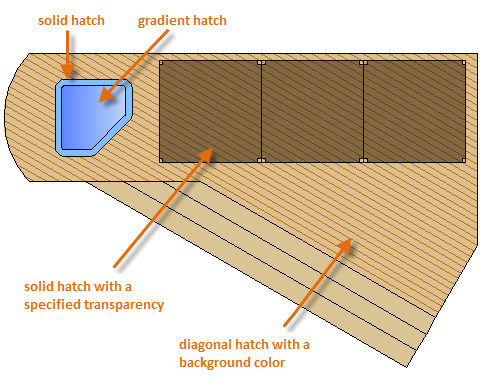
A hatch covers a specified area with a pattern, a solid color, or a gradient to identify a material such as concrete, steel, or grass.
When you start the HATCH command, the ribbon temporarily displays the Hatch Creation tab. On this tab, you can choose from more than 70 industry-standard imperial and ISO hatch patterns, along with many specialized options.
The simplest procedure is to choose a hatch pattern and scale from the ribbon, and click within any area that is completely enclosed by objects. You need to specify the scale factor for the hatch to control size and spacing.
If you set a hatch pattern to be a solid or gradient fill, also consider setting a transparency level on the Hatch Creation tab for interesting overlap effects.
Here are some examples of how you can use hatches:
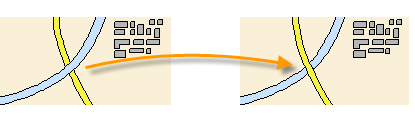
For overlapping hatches, fills, wide polylines, and text objects, use the DRAWORDER command to determine which objects are on top or below. For example, you probably want the yellow highway to cross the blue river rather than the other way around.
Try It: Remove and Add Hatches
In this exercise, add and remove hatches from a sample drawing.
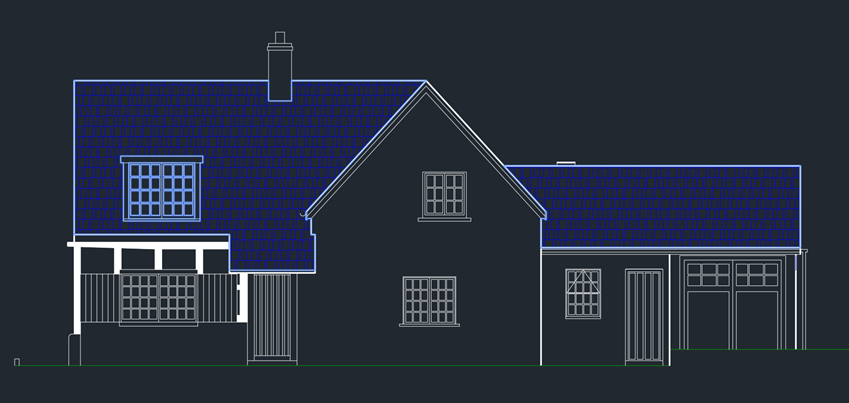
Open the Plan.dwg sample file.
Erase the preexisting blue hatch on the roof. Type ERASE into the Command prompt. When it says Select objects on the Command line, click anywhere in the roof space to remove the hatch. Once you're done, your drawing should have no hatches.
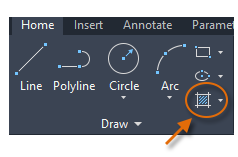
Then, go to Home tab > Draw panel > Hatch. Or type in HATCH on the Command prompt, and press Enter. When the Command line asks you for internal points, click the two roof sections to fill them with hatches.
On the Hatch Creation tab, in Pattern, choose the AR-RSHKE pattern.
On the Hatch Creation tab, in Properties, choose a scale of 0.75 on layer 25. Your roof should look like this:
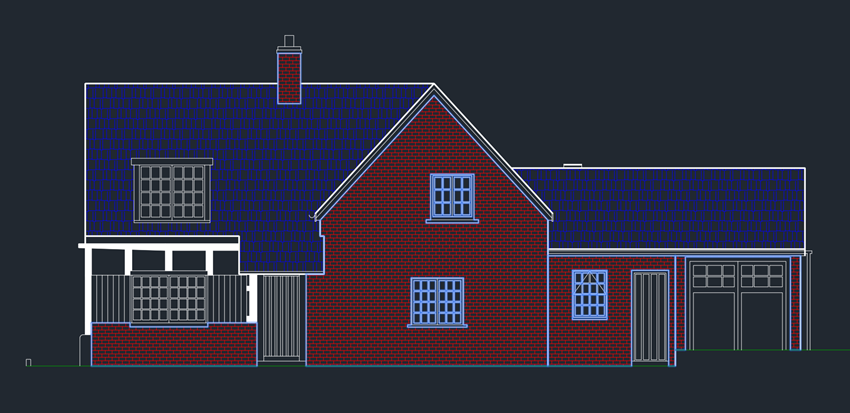
Then, hatch using the BRICK pattern with a scale of 12 on layer 50 to the front of the house and chimney.
Your house should now look like this:
Summary
We've now learned how to add more information to our objects by adding text and hatches. Next, we'll cover how to add dimensions to add further detail to our drawings.