
Use this procedure to create a new construct within a project.
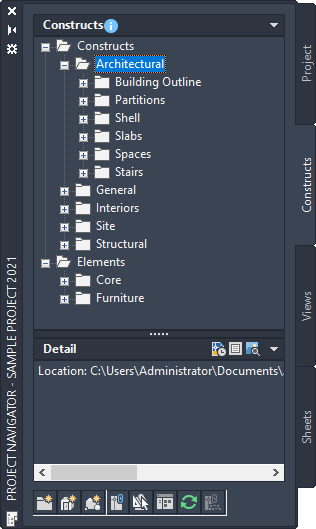
- On the Quick Access toolbar, click Project Navigator
 .
. - On the Constructs tab, locate the Constructs category or subcategory where you want to add the new construct.
- Open the Add Construct dialog box using one of the following methods:
- Right-click the category in which to place the new construct, and click New
 Construct.
 - On the toolbar at the bottom of the Constructs tab, click
 . (You then specify the category in the dialog box.)
- Right-click the category in which to place the new construct, and click New
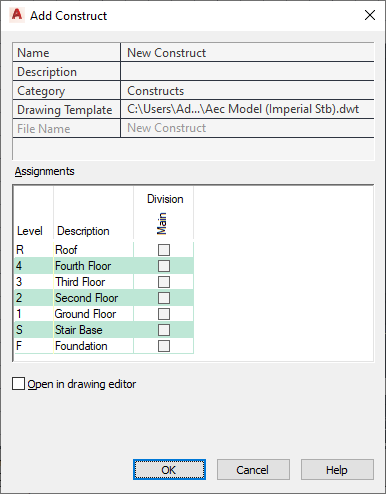
- Define the construct properties:
If you want to… Then… name the new construct enter a name. If the project number is used as a prefix for project file names, you do not need to enter the prefix here. The complete name with prefix is displayed under File Name. enter a description for the construct click the setting for Description, enter a description of the construct, and click OK. change the category of the construct select a category from the Category list. By default, the category you chose in step 3 is suggested. select a different template file click  , and browse for a new template. The software uses the default template set for constructs in the project.
 assign the construct to a level and a division select the correct level and division in the assignments table. Select the desired level row and the division column, and check the appropriate box. Note: You should check only one level and division. Multiple levels and divisions create spanning constructs. - If you want to work in this construct immediately, select Open in drawing editor.
- Click OK.
- Edit the construct as necessary:
- Add objects to the construct.
- Reference elements into the construct.
- Close the construct using either of the following methods:
- Right-click the construct in the Drawing Explorer, and click Close.
- Click
 Close Current Drawing.
- Click Yes to save the changes in the drawing, if necessary.
- To update the tree view in the Drawing Explorer, click
 .
.