
The previous section demonstrated how Autodesk Civil 3D models complex geometries. These concepts imply, and illustrate several best practices for preparing a grading footprint. For example, you can use feature line editing tools in Autodesk Civil 3D to clean up and simplify feature lines.
You can use some of the following best practices:
- Use the Elevation Editor to verify the elevations along feature lines. Look for locations where an elevation may unintentionally drop to zero (0), such as at a split point.
- Use the Weed command (WeedFeatures) to remove unnecessary points and simplify grading geometry where possible. This operation can significantly improve the results where two or more gradings intersect.
- Use the Fit Curve command (FitCurveFeature) to replace tessellated segments with an arc. This operation creates a smoothly curved grading face, rather than many short straight segments. Tessellated segments are common with feature lines created from 3D polylines that do not have arc support, such as those created with the Land Desktop grading commands.
Removing Unnecessary Points
Figure 16 shows the dialog box for configuring the weeding operation. You can specify the weeding factors to apply, adjust the numeric values, and preview the results before committing. Click the Help button on this dialog box to see the Help topic for weeding and learn how to use these controls for best results.
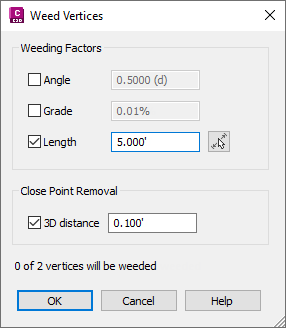
Figure 16: Weeding controls
Replace Tessellated Segments
The grading in figure 17 on the left is graded to the inside of a curve that has been tessellated by line segments. The grading on the right is graded from a true arc. The edited shape of the true arc is a more realistic grading.
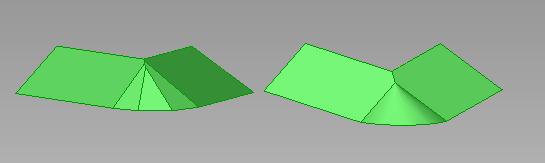
Figure 17: Grading a segmented curve versus a true arc
You can use the Smooth command to convert a tessellated feature line to a true arc, that is similar to the polyline fit curve.