
In this exercise, you will insert multi-view blocks into a drawing, and then place them at the appropriate elevation on a surface.
A multi-view block is an Autodesk Civil 3D object that can have different representations in different view directions.
Predefined multi-view blocks supplied with Autodesk Civil 3D are available in DesignCenter. These blocks represent various items, such as signs, building footprints, trees, and shrubs. In DesignCenter, predefined multi-view blocks are located in the Data folder \Symbols\Mvblocks.
Insert multi-view blocks into the drawing
- Open Surface-7.dwg, which is located in the tutorials drawings folder.
- Click
tab
 panel views list Plan Detail.
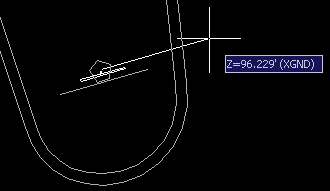
The drawing view shows a two-way road with a median separating the lanes.
- Click
tab panel Find.
- In
DesignCenter, navigate to the
Data folder
\Symbols\Mvblocks. Select the Mvblocks folder in the left pane.
In the right pane, examine the blocks that are available.
Note:Before continuing with this exercise, either dock the DesignCenter palette or click
 to autohide it.
- In the right pane, select R4-7a Keep Right.dwg. Right-click. Click Insert As Block.
- In the
Insert dialog box, specify the following parameters:
- Insertion Point - Specify On Screen: Selected
- Scale - Specify On Screen: Selected
- Scale - Uniform Scale: Selected
- Rotation - Specify On Screen: Selected
- Explode: Cleared
- Click OK.
- When prompted to specify an insertion point in the drawing window, click the
 symbol at the bottom of the median.
- Press Enter to accept the default scale factor of 1.
- When prompted to specify the rotation angle, zoom in to the insertion point and rotate the block until the sign is parallel with the symbol. Click to set the angle of rotation.
- Repeat steps 6 and 7 to insert the
Light Pole 01.dwg block.
When prompted to specify an insertion point in the drawing window, click the
 symbol near the middle of the median. Press Enter to accept the default scale factor and rotation angle.
Move multi-view blocks to the surface
- Click
tab panel views list 3D Detail.
In the 3D view, notice that the street light block appears at the lower portion of the drawing and is not at the appropriate surface elevation. In the following steps, you will move both blocks onto the surface.
- Click
Modify tab Ground Data panel Surface Find.
- Click
tab panel
Move to Surface drop-down
Find.
- In the Move Blocks To Surface dialog box, in the Select Block Reference Names field, select Light Pole 01 and R4-7a Keep Right.
- Click OK. Each selected block moves from its current elevation to the surface elevation at the block’s insertion point.
To continue this tutorial, go to Exercise 2: Rendering a Surface.