
Expenses
The Expense tab enables teams to manage internal and external expenses. Enter invoice and approval information, then the system updates actual cost data for more accurate forecasting. Expense data can also update budget payment applications.
In this article:
- Add Expenses
- Work with Expenses in Foreign Currency
- Add Expense Photo References
- Submit Expenses for a Review
- View Expense Details in the Budget Summary
- Add Expenses to Budget Payment Applications
- Aggregate by Qty/Amount
- Add Time Range Filter on Expense List
- Delete an Expense
- Expense Statuses
- Export Expense Reports
Add Expenses
You need full control permission for the Cost tab to create expenses. Those can be added:
- From an existing spreadsheet
- From an existing contract
- Manually
- Automatically using APIs to build an integration with your accounting ERP system
Add Expenses From a Spreadsheet
To add a list of expenses from an existing spreadsheet:
In the Cost tool, select the Expense tab.
Click
 .
.Choose an Excel file to be imported.
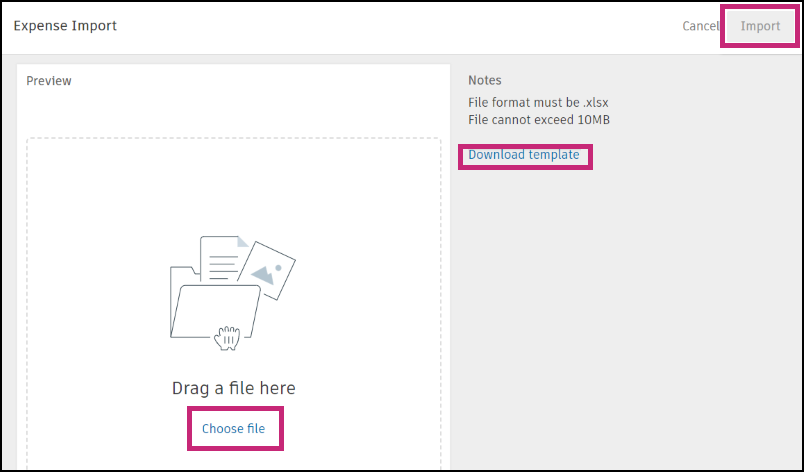 Note: You can use the example template to learn the correct formatting.
Click Import, and then Done.
Add Expenses From an Existing Contract
To add expenses from an existing contract:
In the Cost tool, select the Expense tab.
Click Add from Contract.
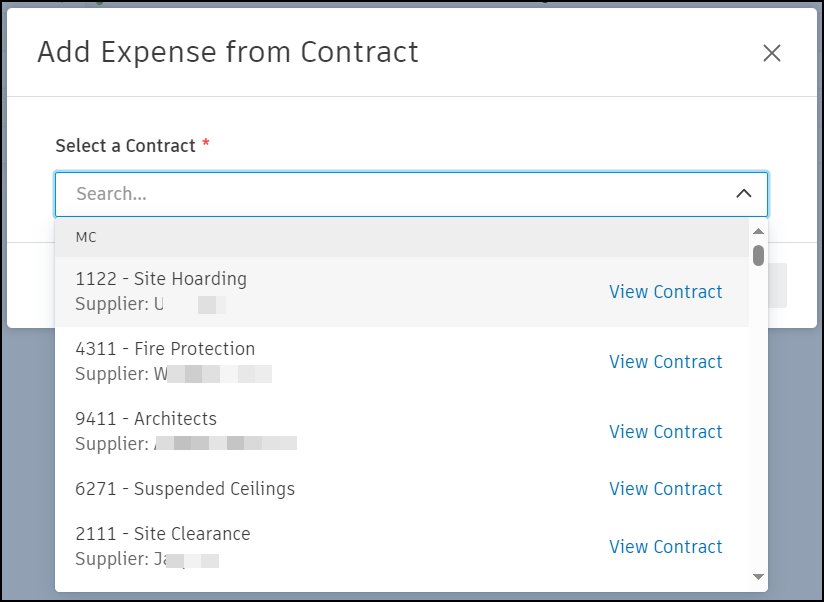
Select a contract with the drop-down list and click Add.
Fill out the following fields:
- Amount: Partial payments require an amount
- Scope: Use the drop-down list to select Partial or Full
- Type: Select a type from the drop-down list
- Date Issued: Select the appropriate date using the calendar
- Status: Select the status using the drop-down list
- Date Paid: When the status is set to Paid the date automatically populates
- Reference Number: To reference an invoice or purchase order
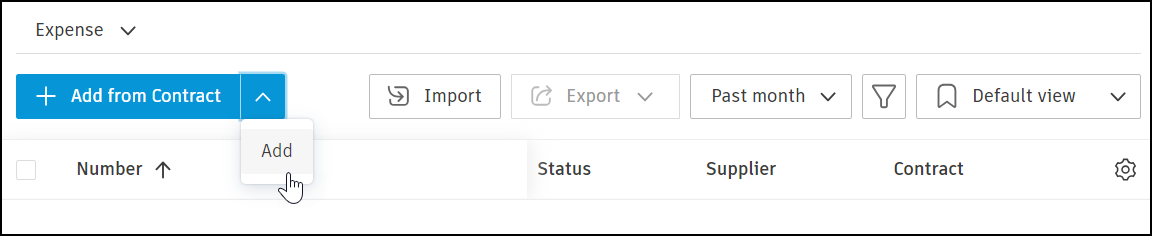
Add Expenses Manually
You can add expenses manually. To do so:
Navigate to the Expense tab (described in the previous example).
Select Add in the drop-down list.
Enter the following information:
- Name: The name of the expense
- Supplier: Select the supplier from the drop-down list
- Type: Select the type from the drop-down list
- Date Issued: Select the appropriate date from the calendar
- Scope: Select Partial or Full in the drop-down list
- Reference Number: Enter an invoice number
Select Add Subitems from the More
 menu.Note: Subitems must be added before changing the status of the expense item.
Enter the following information:
- Name: The name of the subitem
- Budget Code: The budget you plan to pay the expense with
- Amount: Price of the subitem
- Scope: Select Partial or Full in the drop-down list
Set the status of the expense item to Open in the details panel.
Items and subitems can be deleted through the More menu.
Work with Expenses in Foreign Currency
Expenses can be entered and managed in foreign currencies when working with international suppliers. For detailed information about foreign currency handling in expenses, including exchange rate management and currency conversion, see Foreign Currency in Payment Applications.
Add Expense Photo References
Use the photo reference capability for expenses to ensure supplemental information such as delivery tickets or receipts are available to process payments.
To add a photo reference:
Within the Cost tool in Cost Management, navigate to the Expense tab.
Select an expense item to open the flyout panel, scroll to the Linked References section and select Add References.
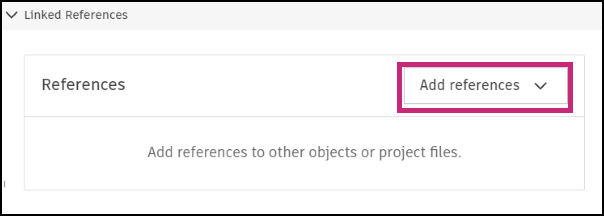
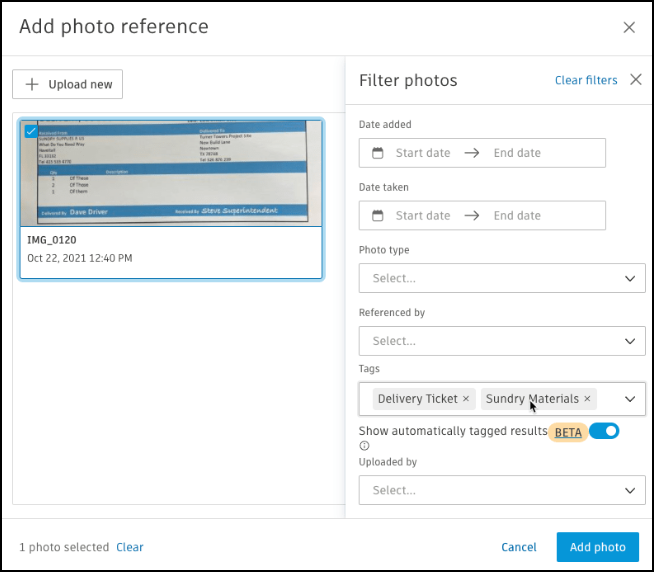
Existing photos from the Photos tool in Autodesk Build will appear in the Add Photo Reference window. To upload a new photo, select Upload New.
Choose the files from your desktop or drag and drop.
Select Upload, and then Add Photo.
You can use filter to quickly find specific photos. Select the funnel icon to access filters including location, date added or taken, photo type, referenced by, tags, and uploaded by.
Learn how to take the photos on iOS, on Android, and tag them on Mobile.
Submit Expenses for a Review
After you fill out the information for your expense item, you can submit it and send an email to reviewers. An approval workflow is an extra step in the expense workflow. See the Approval Workflow article to learn more.
After adding an expense:
- Click Submit. The status changes to Pending.
- Click Approve or ask for a review unless there is an approval workflow established. If not, the status of the expense item is changed to Approved. Learn more about expense statuses.
- After the payment, click Set as Paid.
View Expense Details in the Budget Summary
Similar to approved cost payment application details pulling into the budget summary, approved or paid expenses automatically pull into the budget summary view, giving you the ability to view actual cost breakdowns and make accurate forecast adjustments.
To see the expense details in the Budget table:
In the Budget tool, navigate to the Budget tab.
Scroll to the Actual Cost column. Expenses with an approved or paid status will be displayed in the list.
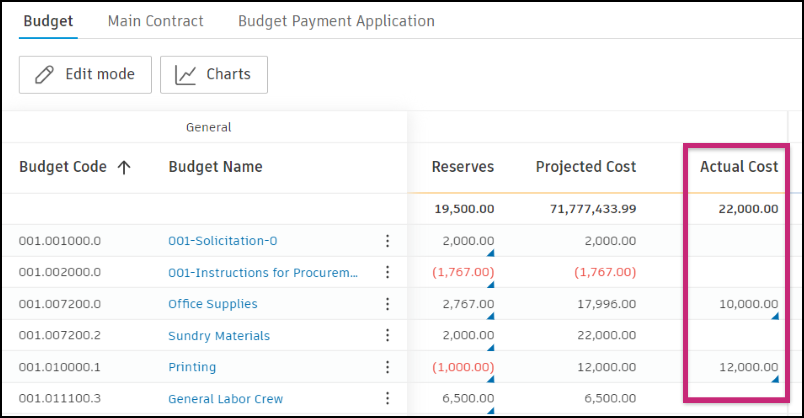
Select the total in the Actual Cost column to view the cost breakdown.

Click the budget name to open the flyout panel for more detailed information.
See the Budget and Contract Tables or Work with Budgets articles to learn more about working with the Budget tool and its table views.
Add Expenses to Budget Payment Applications
You can add expenses manually to a budget payment application to track them and show liability against the budget.
To add an expense:
Select the Budget tool.
Select the Budget Payment Application tab.
Use the contract and date drop-down lists to navigate to the appropriate budget payment application.

Select the main contract name to open the details panel.
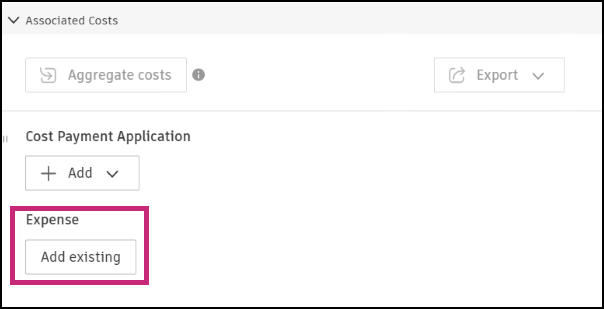
Click Add existing in the Associated Expense section.
Select the appropriate expenses to associate.
Click Add.
To detach expenses, select the More menu of the expense row.
Aggregate by Qty/Amount
For detailed information about expense aggregation options when adding expenses to Budget Payment Applications, see Payment Application Data Aggregation.
Add Time Range Filter on Expense List
You can easily filter the existing expenses on your list by time range to quickly get the information you need. This feature can be useful when exporting a report. Please note that this view won't be added to saved views. For more details on using time range filters with exports, see Export Payment Reports.
To add a time range filter:
- Select the Cost tool from the left navigation.
- Switch to the Expense tab.
- Click the Past month drop-down list, next to the Export one.
- Select one of the following predefined options:
- Past month
- Past 3 months
- Past 6 months
- Past year
Alternatively, you can choose a custom range by clicking the "Custom range" option. This will allow you to select a start and end date for the expenses you want to see.

Delete an Expense
You can delete expense items or subitems using the More menu . To delete an expense item or subitem, the status must be Draft, Pending, Revise and Resubmit, or Rejected.
Expense Statuses
Learn more about statuses in the expense workflow:
- Draft: The beginning status while creating the expense item.
- Pending: Completed and currently under review. You can request a revision by adding a comment or setting up an expense workflow. See this article to learn more about approval workflows.
- In Review: Once an expense workflow is set up, this status means that the reviewers have time to revise the expense details. The project administrator can remind them or ask another reviewer to do the review.
- Revise and Resubmit: Approver requested rework.
- Approved: Expense was reviewed and approved by reviewers or the project administrator, who can set an item as paid.
- Rejected: Expense was rejected by reviewers or the project administrator, who can request an extra revision.
- Paid: All parties agreed on expense and the project administrator set an item as paid.
Export Expense Reports
You can create formatted reports of expenses to share with stakeholders. For detailed instructions on exporting expense reports, including PDF and Excel options, template selection, and time range filtering, see Export Payment Reports.