
Exporting Clips and Sequences to Files
To export a clip or a sequence:
Do one of the following:
- Open the context menu of the clip to export and select Export.... Then, using the Media Export window, navigate to the export's destination.
- From the MediaHub, drag-and-drop the file from the Media Panel to the location displayed in the browser.
Select an Export type and a Format Preset.
Click Export.
The application prepares the export job. Once preparation is done, the rest of the export runs in the background and frees the application for use.
Multiple clips can be exported in one operation:
- Use Ctrl + click to select multiple clips to export.
- Select a folder, a reel, or a library from the Media Panel to export all of its contents. If it contains a folder structure, that structure also gets exported.
To export an RGBA movie file or file sequence, first create a Matte Container. You can:
- Use the Create Matte Container option in the MediaHub. The resulting clip will be a Matte Container and the Comp effect will be disabled.
- Use the Create Matte Container tool and select the Contain option.
- Use the Add Matte option in the Timeline FX ribbon to create a Matte Container, but make sure to mute the Comp effect before exporting.
Export Link Media
The Link Media options allow the use of hard links between the exported media file and the intermediate or original source media files when enabled. By creating hard links instead of generating new media, the export process can be accelerated and required storage space reduced.
To enable Link Media:
- Enable Show Advanced Options.
- Select the Video Options tab.
- Change Generate Media to one of the Link Media options.
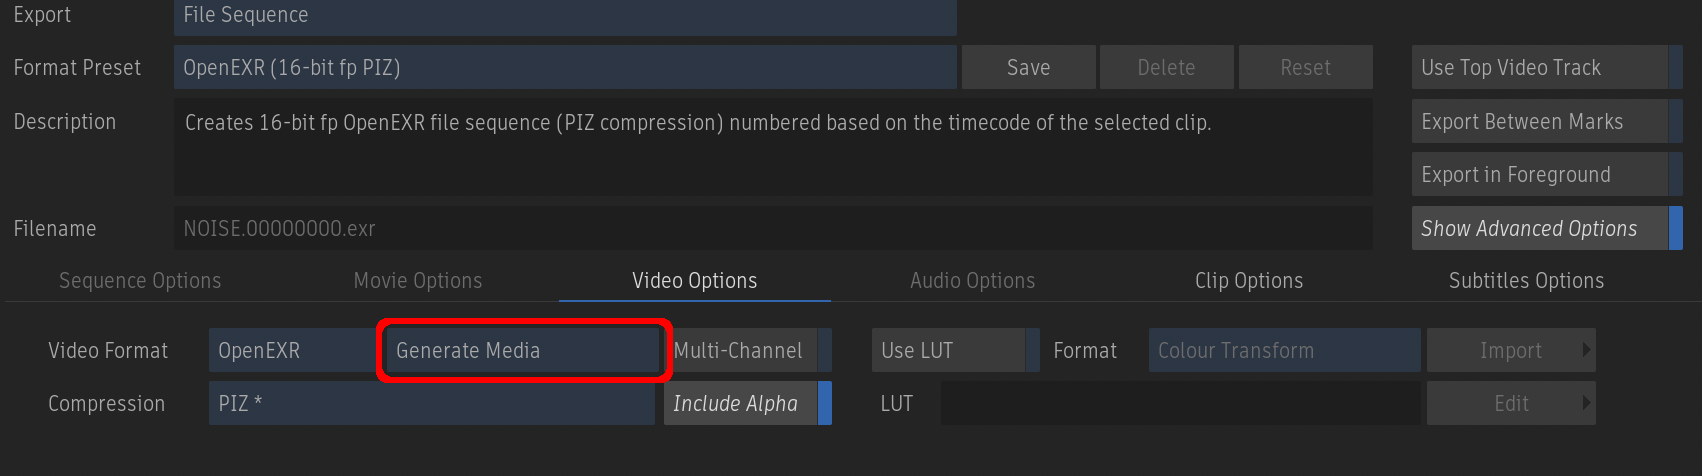
| Select: | To: |
|---|---|
| Generate Media | Generate new media files. |
| Link Media (Compression) | Only link media if Resolution, Bit Depth, and Compression of the source match the destination. |
| Link Media (Bit Depth) | Only link media if Resolution and Bit Depth of the source match the destination. |
| Link Media (Resolution) | Only link media if Resolution of the source matches the destination. |
| Link Media | Always attempt to link media. |
Metadata Overlay for Export
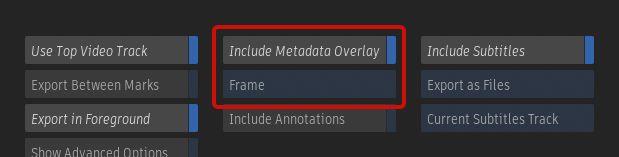
The Metadata Overlay can be burned into the image during an export. The option is available for File Sequence and Movie, but not for Sequence Publish.
To burn the Metadata Overlay on export:
- In the Media Export dialog window, select Include Metadata Overlay.
- From the Metadata Overlay Selection drop-down, select the overlay to burn on the exported media.
The Hardware and Software Anti-Aliasing values set in a Burn-In Metadata setup are applied on export.
Setting Sony XDCAM HD Compatibility
XDCAM HD files can be of two flavours: XDCAM camera files and broadcast-compatible files.
MXF XDCAM HD camera files are encoded based on Sony's XDCAM format, and all start with a full Group of Pictures (GOP). On the other hand, broadcasters often use a different flavour of XDCAM HD, where the media start with a short GOP (starting on an I-frame).
The default Sony XDCAM HD format presets default to the broadcaster-compatible short GOP. It is also possible to output XDCAM camera-compatible files.
To output Sony XDCAM 422 1080p as XDCAM camera files:
- In the Media Export dialog window, set Export
 Movie.
- Set Format Preset Autodesk Sony XDCAM MXF (XDCAM HD422 1080p 8-bit).
- Enable Show Advanced Options.
- Set Profile XDCAM Compatible.
Profile export options:
- XDCAM compatible: Use this encoding profile to create MXF files with Open Group of Pictures (GOP). Resulting files match XDCAM files recorded by cameras.
- Broadcast Compatible: Use this encoding profile for any Broadcast deliverables. This profile creates MXF files with Closed Group of Pictures (GOP) as Short First GOP. This profile also optimizes the number of frames per GOP with scene detection.
- Broadcast Compatible, Identical GOPs: Use this encoding profile if you require a constant number of frames per GOP (beyond the first one). This is the same as the previous profile except that scene detection is disabled.
XDCAM Essence Container Version
It is now possible to set the XDCAM MXF Essence Container version number in corresponding encoding profiles.
The default value is 1, but some QC systems require the version to be set to 2.
To change the default MXF Essence Container version:
- With administrative permissions, in a text editor, edit the profiles inside the following hidden directories under
/opt/Autodesk/mediaconverter/<Flame version>/profiles/.17041416(XDCAM HD422 1080).17106952(XDCAM HD422 720p).18089992(XDCAM HD 1080 Thin Raster).18155528(XDCAM HD 720p)
- Set the value field in the following line, replacing "1" with "2".
<param description="Essence Container UL Version Number [1..127]" internalname="EssenceContainerULVersion" name="Essence Container UL Version Number" type="int" value="1"/>
- Save the file.
- Restart the application.
For Background Export, make the same modification to the profiles on every Backburner Server host that will run export jobs.
Multi-Channel Export
It is possible to export multi-channel media as OpenEXR multi-channel files.
To export an OpenEXR multi-channel clip:
From the Export menu, set Export to File Sequence.
Set Format Preset to an OpenEXR preset.
Enable Show Advanced Options.
Enable Multi-Channel.
Multi-Channel is only available if the Link Media option is set to Generate Media.
Set the other export parameters, as required.
Click Export.
Behaviour of tracks with the multi-channel option:
- When enabled, the version tracks of a clip are used to create a Multi-Channel OpenEXR file.
- When disabled, only the Primary Version is used to generate an RGB or RGBA media file (RGBA is generated from a Matte Container or from any Timeline FX generating a Matte).
- The name of the Version Track defines the channel's name in the OpenEXR file sequence.
- If the Version Track name is undefined (for example, *), the name of the first segment of the Version is used.
- The RGBA channel can be created by naming the Track or Segment with the token <name> and <name>_alpha.
Export Tips
Muted tracks are not exported.
Rendering the entire sequence before exporting is not required: Flame automatically renders only the media required for export.
Minimise the storage footprint by using Export in Foreground.
For File Sequence and Movie, foreground export allows media to be exported without pre-rendering. This option streams content directly to the exported file, so Flame does not need to allocate frames on media storage, reducing export time.
For Sequence Publish exports, when media must be packaged, Flame renders before exporting segments that must be pre-rendered. For example, using the Flattened Tracks option with Timeline FX requires rendering prior to exporting, as do segments with a BFX or Resize.
When exporting with Export Between Marks, you can have pre-roll and post-roll black by setting the in and out marks to include some empty track. Each frame of included empty track creates a frame of black on the export.
When exporting a single frame as a file sequence, consider setting the Frame Padding field to zero to export that frame without any file numbering. And if you export a multi-frame clip as a file sequence by mistake without Frame padding, Flame detects this and automatically assigns a frame padding of 8 digits to correctly export the clip.
When working with CODEX files, you cannot use the Link Original Media option in Media Export to create file system links to the original media files because Flame cannot generate 12-bit packed DPX, the format used by CODEX recorders. Flame will instead create new 12-bit unpacked DPX files.
OpenEXR exports include Tape name and Keycode data in the exported files' header. The tape name is stored in attributes "reelName" and "owner". (The latter is for compatibility with Resolve.)
DPX metadata
- The frame rate is written to the DPX file header, in both the TV rate and Movie rate fields.
- The Drop Frame mode of 29.97 fps files is written to the DPX file header. Limitations from the DPX SMPTE-specifications prevent the drop frame mode from being specified in files using a timecode higher than 30 fps.
In ProRes exports, Flame corrects the aspect ratio to match the Apple-defined standard. For PAL 16x9, the standard pixel aspect ratio is 118:81. For a frame of 720x576 this gives an aspect ratio of ~1.82 = (720 / 576) × (118 / 81).
MXF DVPro: a PAL export is always F2; an NTSC export is always F1. Fields are translated if required.