
Before users can access Info360 Plant, an Admin needs to complete the steps listed below.
Once these are completed, users will be able to access Info360 Plant from their Autodesk Account. See Log in to Info360 Plant.
1: Create a hub and activate Info360 Plant
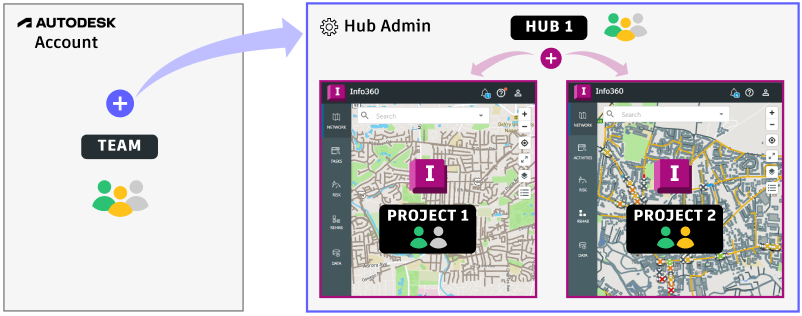
To activate Info360 Plant, you must create a hub. This is done from your Autodesk Account. A hub is associated with a team and contains one or more projects and their members. You can have one or more hubs (max. 10) per team (e.g., for different regions).
Learn how:
Once you've created your hub in Autodesk Account, go to Hub Administration.
2: Add hub members
Within Hub Administration, go to the Members section to add hub members. You can copy and paste a list of user emails to add them in bulk or type them in manually.
The users you add to the hub will also automatically be added to the associated team in Autodesk Account (if they don't already exist there).
Learn how:
- Manage Hub Members
- (Optional) Roles: Optionally, you can create roles to control project access levels (project member or project admin). There are two default roles created (Model Editor and Model Reader), but these are for use with our desktop products.
3: Assign member subscriptions
In Hub Admin, you need to assign an Info360 Plant subscription to members by clicking on each member and selecting the appropriate subscription.
If you want to make any other members a Hub Admin (allowing them to manage members and projects), you can do this now too by modifying their Access Level to Hub Administrator.
Learn how:
- Manage Hub Members
- Alternatively, you can do this from your Autodesk Account, where each subscription is available as a product that you can assign to users. See Assign product access.
4: Create a project
Within your hub, you must create your first project. A project is a sub-container within a hub and is where project members can work in Info360 Plant with the project's data. You can have multiple projects per hub.
Learn how:
5: Add members to a project
Next, add members to your project. If you have already added hub members, you can just search by name and add. For each member, you'll also need to specify the project access level (project member or project admin) and the products (which products the members can access the project in). As the project creator, you will be added as a project admin, but you still need to toggle on the appropriate products for yourself.
Learn how:
6: Assign additional admins (optional)
- Access to additional tabs in the Admin section:
- General Settings
- System Connections
- Sensor Configuration
- Implementation
- Ability to unlock and delete workspaces
To assign admins:
- Team admins: Assign additional Primary and Secondary Autodesk Admins in Autodesk Account. See User management Admin roles. They will be able to manage team subscriptions, hubs, users, etc.
- Hub admins: In Hub Admin, change the member's access level to Hub Administrator. They will be able to manage the hub's projects, members, settings, etc.
- Project admins: Within the project, change the member's access level to Project Administrator. They will be able to manage project settings and members in Project Admin, as well as having the additional permissions listed above for the project in Info360 Plant.