
You can create new file references from the Reference Options window. Creating a reference involves setting reference options and then browsing to the location of the file you want to reference into the parent scene. You can access the Reference Options window by:
- Right-clicking an empty area in the
Outliner and selecting
Reference > Create Reference >
 .
.
- Selecting
File > Create Reference >
.
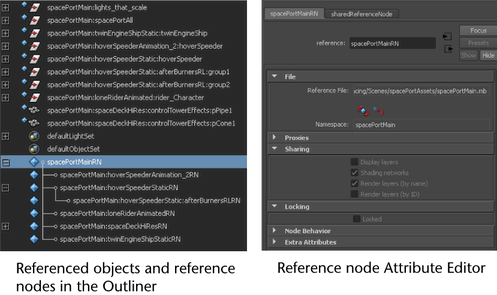
After you create a file reference, it is loaded in the scene and its reference node appears in the
Outliner indicated by an
 icon. Objects belonging to referenced files are indicated by an
 icon and grouped objects by an
 icon. To see reference nodes and the object hierarchy or members of each reference node, in the Outliner
Display menus, turn on
Reference Nodes and
Reference Members
icon. To see reference nodes and the object hierarchy or members of each reference node, in the Outliner
Display menus, turn on
Reference Nodes and
Reference Members
The Attribute Editor displays the information about reference nodes such as the reference file path, its namespace, and sharing details. You can unload and reload references by clicking the icons located in the File section.
There are a number of options you can use to manage and modify file references and their contents. These options are available from the Reference menu in the Outliner or Reference Editor. They include:
- Export selected objects as a reference
- Load, unload, and reload references
- Preview unloaded content
- View selected references
- Duplicate, replace, and remove references
- Save, import, export, and view edits made to references
- Lock and unlock references
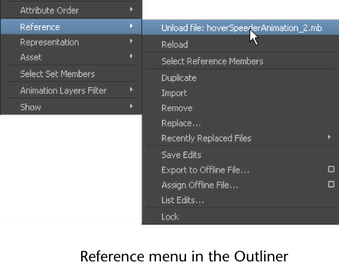
For information about the Reference menu options, see Outliner contextual menu.