• Help Home
  • English (US)
    1. English (US)
    2. 简体中文
    3. 繁體中文
    4. 日本語
    5. 한국어
Moldflow Communicator
    • Getting Started
      • Quickstart
      • Enabling the Launch Wizard
      • Projects and studies
      • User Interface
        • Model View pane
        • The ribbon user interface
        • Dynamic Help
        • Navigation tools
        • 3D motion controllers
        • ViewCube
        • Navigation Bar
          • Adding a tool to the Navigation bar
          • Removing a tool from the Navigation bar
          • Repositioning the Navigation bar with the ViewCube
          • Repositioning the Navigation bar along the model window edge
          • Adjusting the opacity of the Navigation bar
        • Steering Wheels
        • Cutting planes
        • Layers
        • Context menus
        • Windows
        • Locking
      • Customizing this product
    • Model Preparation
    • Analysis Types
    • Materials
    • Processing Conditions
    • Optimization Analyses
    • Results
    • Troubleshooting
    • Video Library
    • Tutorials
    • Reference Materials
    • Installation Supplement
    Share
    • Email
    • Facebook
    • Twitter
    • LinkedIn

    Adding a tool to the Navigation bar

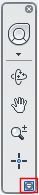
    1. Click on the Customize button, located on the bottom right-hand corner of the Navigation bar.

    2. From the Customize menu, click the navigation tool you would like to display on the Navigation bar.

      A check mark next to a navigation tool indicates that it will be displayed on the Navigation bar.

    Parent page: Navigation Bar

    Was this information helpful?

    Except where otherwise noted, this work is licensed under a Creative Commons Attribution-NonCommercial-ShareAlike 3.0 Unported License. Please see the Autodesk Creative Commons FAQ for more information.

    • Privacy Statement
    • Legal Notices & Trademarks
    • Report Noncompliance
    • © 2025 Autodesk Inc. All rights reserved