
Setting up the First Component for Overmolding
Because the mold rotates during the overmolding process, you need to specify the position of the first component during the first shot (A), and then during the second shot (B).
- Select the first component (1) in its first shot position.
- Right-click in the Model pane and select Properties. Select Part (3D) and click OK.
- Select the Overmolding Component tab, set the Component option to 1st shot and check the Rotation element box, then click OK.
- Select the runner system associated with this first component of the first shot cavity (2).
- As previously, set its property to 1st shot with the Rotation element checked.
- Repeat the two previous steps as necessary for each other entity type related to the first component of the first shot cavity, if any.
- Using the Layers pane, select the first component in the second shot position (3).
- Right-click in the Model pane and select Properties, Part (3D) and click OK.
- Select the Overmolding Component tab, set the Component option to 1st shot and ensure that the Rotation element box is deselected. Then click OK.
- Repeat the two previous steps at least for the corresponding runner system (4), and for each other entity type related to the model.
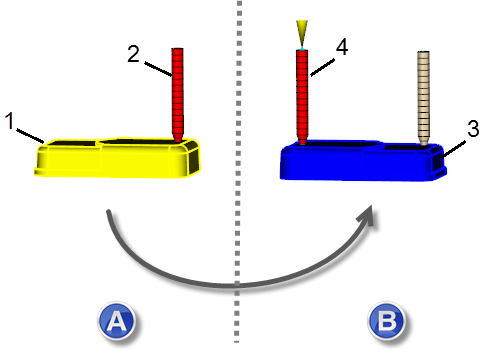
Position of the first component during the first shot (A), and then during the second shot (B).