Manage Users
Add users to your Fusion Manage site, assign licenses to them, and manage their permissions by assigning them to appropriate user groups.
View Users
On the Administration menu, mouse over Security and click Users.
The Users tab opens.
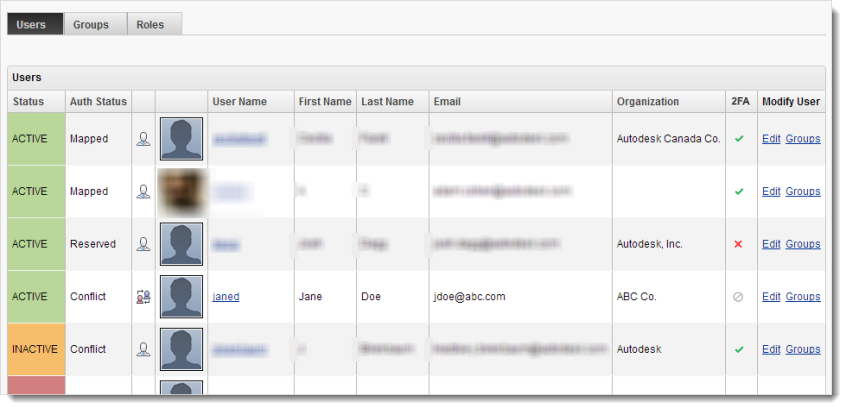
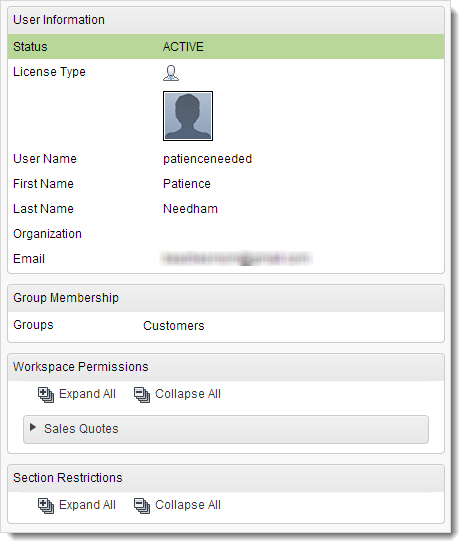
In the Users table, click the User Name.
Add a User
On the Users Groups Roles page header, click the New User icon.
Enter the new user's First Name and Last Name.
Enter the Email address associated with the user's Autodesk account.
Important: The email address must exactly match the address associated with the user's Autodesk account.License types are assigned using Autodesk Account user management tools. For more information, see Assign users to products.
Leave Account Status as Active.
Optionally set up the user's preferences for Time Zone, Unit of Measure, and Show Thumbnails for Attachments. The user can change these preferences any time in their Fusion Manage Profile.
Do one of the following:
- To save the user, click Create User.
- To save and add the new user to groups, click Create and Add To Groups and go to step 2 in the section, “Add a User to Groups.”
Assign a license to a user with Autodesk Account Management
When you add a user from the Fusion Manage administration page, that user is given Basic Access (limited viewing) to Fusion Manage. To give the user full access, you need to assign a license to them using Autodesk Account Management.
At the top of the Fusion Manage users administration page, click manage.autodesk.com.
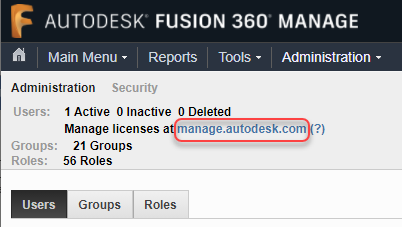
The Autodesk Account Management page opens.
On the Account Management page, under User Management, click By Product.
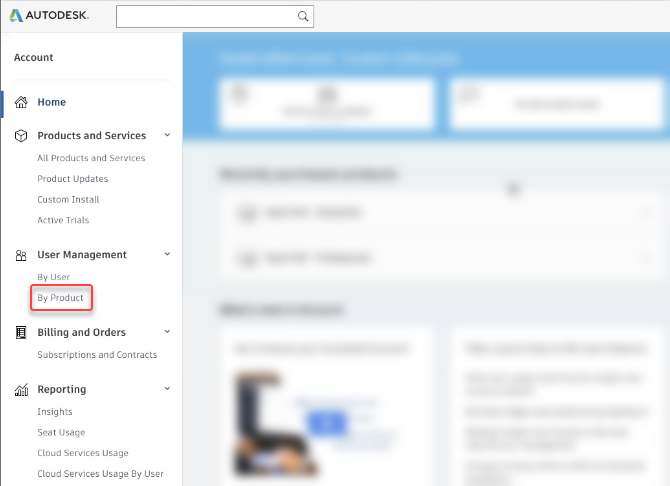
Follow the steps described in the Account Management help topic, Assign users to products, to assign a Fusion Manage license to the user.
This will invite the user to the team and provide them with the proper entitlement to use Fusion Manage.
Manage license consumption
By default, all users consume a license upon log in.
Under certain circumstances, such as using Flex, administrators may want to give users Basic Access by default. Basic Access limits a user to viewing only and consumes a license only when a user requires a license to perform an operation.
In the Modify User column of the Users table, click the user's Edit link.
Deselect Consume License Automatically to limit the user to consuming a license only when an operation requires one.
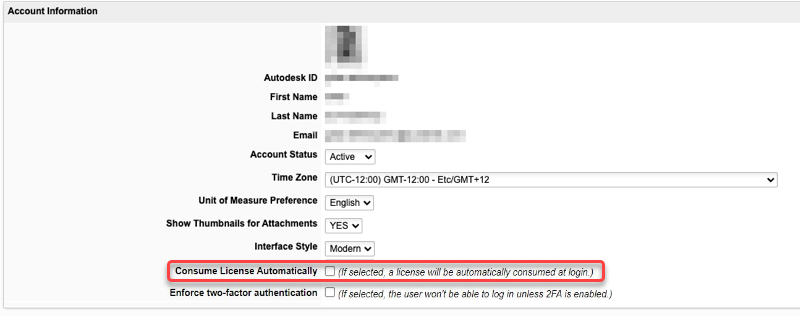
A banner displays when the user logs in explaining that the application is in Basic Access mode. Users of the modern interface can enable Full Access.
Manage two-factor authentication (2FA) for a user
You can enforce two-factor authentication for all site users under Administration > System Configuration > General Settings > Security Settings. If you do this, all users need to enable 2FA in their Autodesk profile before they can log into the tenant. However, there are times you might want to disable 2FA enforcement for an individual user. For example, a user might be using 2FA outside of their Autodesk Profile, in which case enforcement is not needed inside the tenant.
In the Modify User column of the Users table, click the user's Edit link.
Deselect Enforce two-factor authentication.
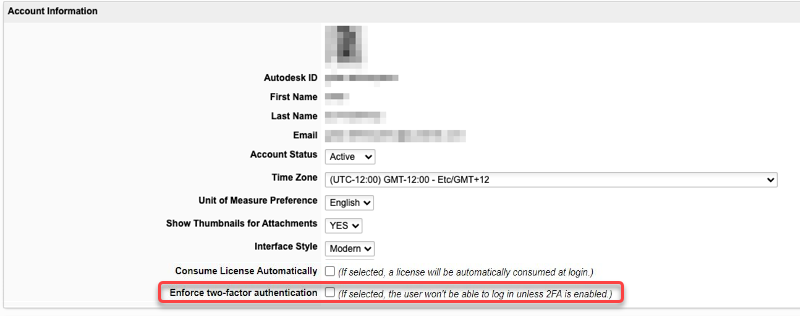
Under Administration > Security > Users, you can view the 2FA setting of each user in their Autodesk profiles.
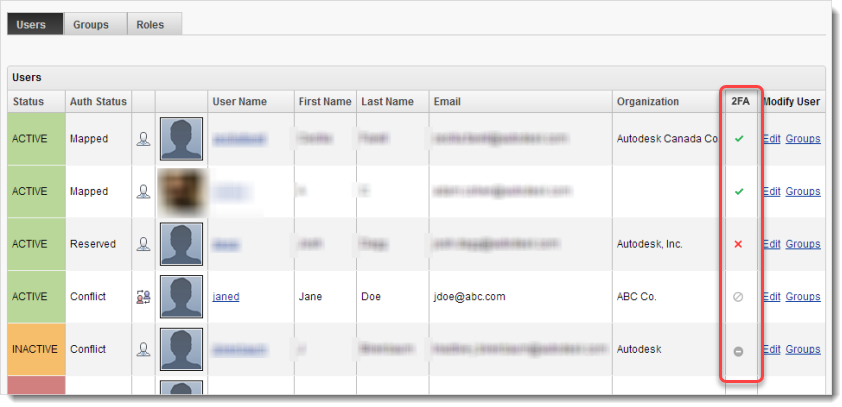
 2FA on
 2FA off
 2FA managed externally
 2FA status can't be determined (user hasn't logged in recently, status will be updated at next login)
Add a User to Groups
On the Fusion Manage administration page, in the Users table, click the user's Groups link.
On the Managing Groups for User page, select groups in the list box on the left and add them to the list box on the right.
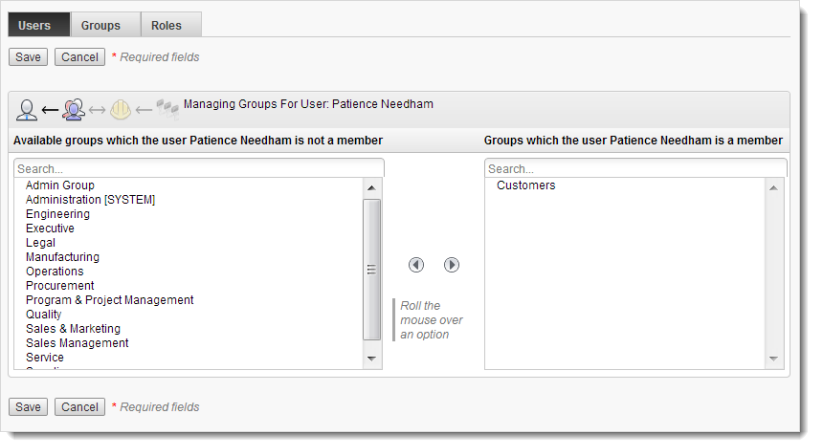
Click Save.
Add the user to more than one group at a time:
- CTRL+Click the groups you want to add and then click the right-arrow button.
Remove a user from a group:
- In the list box on the right, double-click the group OR select the group and click the left-arrow button.
View a description of a group:
- Mouse over the group in either list box.
Filter the group lists:
- In the Search box above the list, start entering the first few characters of the group until matches appear in the list.
- To clear the filter, click the
 button.
Edit Users
User Profiles are linked to the corresponding Autodesk accounts and Autodesk account information is dynamically brought into Fusion Manage Profiles in read-only mode. Users can edit their information directly in their Autodesk Account or through their Fusion Manage Profile. Once a Profile has an Auth Status of Mapped, the only information an Administrator can edit in a user's Profile is Fusion Manage properties such as License Type, Account Status, and preferences.
Edit a User's Profile
- In the Modify User column of the Users table, click the user's Edit link.
- In the Account Information panel, change information as needed and click Save.
Change a User's Groups
- In the Modify User column of the Users table, click the user's Groups link.
- On the Managing Groups for User page, add or change groups as shown in Manage Groups.
Deactivate or Delete Users
- In the Modify User column of the Users table, click the user's Edit link.
- On the Managing Groups for User page, change the user's Account Status to Inactive or Deleted and click Save.
