- In the Project Setup tree view, expand Plant 3D DWG Settings.
- Continue to expand the list until you locate and click Pipe Run Component.
- On the Class Settings pane, under Properties, click Add.
- In the Add Property dialog box, do the following;
- Under Property Name, enter a name for the new property (for example: SpecNew). The name cannot contain spaces.
- Under Display Name, enter the name that you want displayed for the new property in the Data Manager or Properties palette (for example: SpecNew).
- Under Choose a Type, click Selection List.
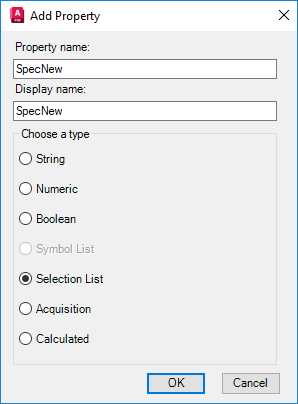
- Click OK.
- In the Selection List Property dialog box, click Add List.
- In the Add Selection List dialog box, enter the name for the new selection list (for example: Spec). Click OK.
- In the Selection List Property dialog box, click Add Row.
- In the Add Row dialog box, enter the new value (for example: CS300) and a description of the value, if necessary.
- Continue adding rows until the selection list is complete.
- Click OK.
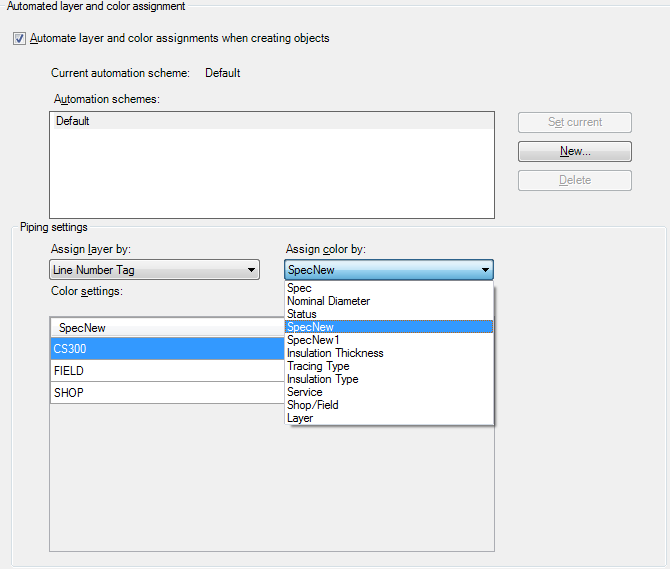
- In the Project Setup tree view, expand Plant 3D DWG Settings. Click Layer and Color Settings.
- On the Automated Layer And Color Assignment pane, in the Assign Color By list, click the new item.