
Use the Grid tool to select grid lines to place beams automatically between other structural elements such as columns, structural walls, and other beams.
For example, you might have 2 structural columns located on a grid line. Beams are also added between columns and structural walls.
- Click Structure tab
 Structure panel
  (Beam).
 - Click Modify | Place Beam tabMultiple panel
 (On Grids).
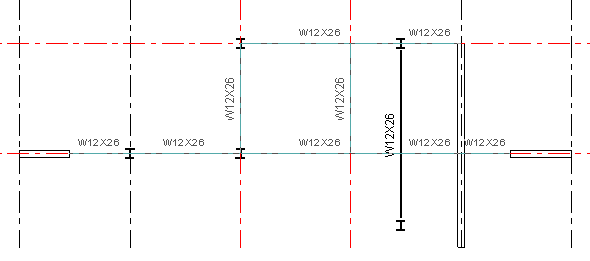
 In the image below, you can see assorted columns, a beam, and structural walls in a plan and 3D view. In this case, you can use the Grid tool to add the majority of the beams automatically.

- Select a grid line along which you want to place a beam.
Press and hold Ctrl to select multiple grids.
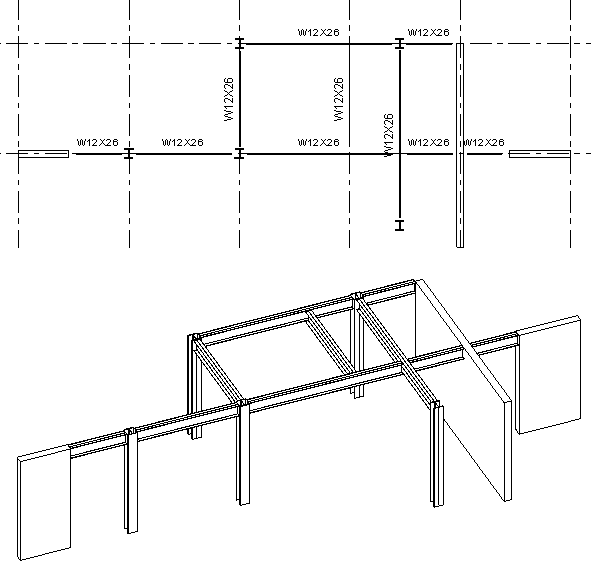
In the image shown below, grids have been selected and beams have been added automatically between all columns, walls, and beams.
- Click Modify | Place Beam > On Grid LinesMultiple panel
 (Finish). Tip: You can also draw a pick box to select multiple grid lines.
In the image below, notice how the beams were added between all columns, walls, and other supporting beams. The pre-existing beam was not cut by the beam perpendicular to it.
- All the possible supports that intersect the grid line, such as columns, walls, or beams, are scanned.
- If a wall is on the grid line, a beam is not placed in the wall. The ends of the wall are used as support.
- If a beam intersects and crosses the grid line, that beam is considered to be an intermediate support, because this beam supports new beams created on the grid line.
- If a beam intersects but does not cross the grid line, this beam is supported by a new beam created on the grid line.
When Revit places beams along a grid line, it uses the following conditions: