
Use the Steel Connections for Dynamo Nodes
See the steps to use the Steel Connections for Dynamo nodes.
Starting with Revit 2021, the Steel Connections nodes dedicated to placing steel connections are provided with the Revit installation, as part of Dynamo for Revit. All the nodes, custom nodes, and sample scripts are pre-installed, and all the functionalities that were provided by the "Autodesk Steel Connections 2020" package will be available without the need of additional setup, speeding up the deployment and offering an integrated experience within Dynamo for Revit. Manually downloading the package using the Package Manager is no longer needed.
To use the steel connections sample scripts:
- In Revit, click Manage tab ➤ Visual Programming panel ➤ Dynamo.
- In Dynamo, under SAMPLES, the steel connection sample scripts will be available in a common folder with Dynamo for Revit sample scripts.
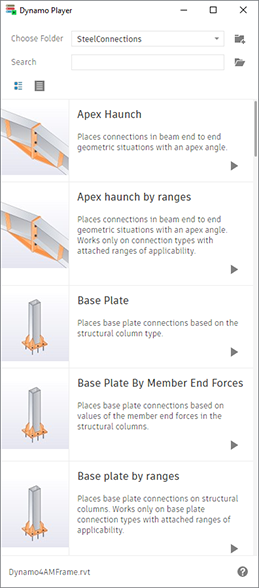
The list of steel connections sample scripts will appear in Dynamo Player:
The Steel Connection nodes can be found in the Dynamo library, under Revit Steel Connections.
The custom nodes delivered as part of some of the sample scripts are listed under Add-ons Revit Steel Connections.
Note: The Steel Connections functionality remains unchanged. Sample scripts created with versions prior to 2021 can be used without restrictions or other changes. Load the sample scripts into Dynamo Player, from: C:\ProgramData\Autodesk\RVT 2022\Dynamo\samples\<language-folder>\Revit\SteelConnections.
- Click Manage tab ➤ Visual Programming panel ➤ Dynamo Player.
- In the Dynamo Player dialog, click
 (Browse to folder).
 - In the Browse to Folder dialog, navigate to the directory containing Dynamo scripts.
For more information about graph security and trusted locations, see About Dynamo Graph Security.