
Issue:
How to install and set up Revit Server?
Solution:
Considerations for the Revit Server Setup
A separate instance of Revit Server is required for each version of Revit (for example, Revit Server 2021 is required for Revit 2021 files, Revit Server 2022 for Revit 2022 files).
Note: Multiple instances can be installed on the same server.
Internet Control Message Protocol (ICMP) requests from Revit workstations and Revit Server Accelerators must be allowed to pass through the firewall to the Revit Server Hosts.
The procedure for installing an instance of Revit Server is the same regardless of whether that instance will host central models, cache local models, run the Revit Server Administrator, or perform some combination of these roles (Host, Accelerator, and Admin).
Overview
Background.
Install Revit Server Prerequisites.
Revit Server Installation.
Create a primary RSN.ini File.
Save Revit Files to Revit Server (Optional).
Post Installation testing (Optional).
Background
Revit Server is an IIS-based application server. For more details, see About Revit Server.
Revit Server's design intent is to facilitate worksharing for geographically separated users within a single company (Windows Domain).
Install Revit Server Prerequisites
Verify that the Server is running a compatible Server Operating System by reviewing the Revit Server portion of the Revit System Requirements (the following table also shows these versions).
Install the appropriate Window Server Prerequisites from this table:
Version |
System |
Windows Server |
Standalone Installer |
2026 |
Windows Server 2019 Windows Server 2022 |
||
2025 |
Windows Server 2019 Windows Server 2022 |
||
2024 |
Windows Server 2019 Windows Server 2022 |
||
2023 |
Windows Server 2019 Windows Server 2022 |
||
2022 |
Windows Server 2016 Windows Server 2019 Windows Server 2022 |
||
2021 |
Windows Server 2012 Windows Server 2016 Windows Server 2019 Windows Server 2022 |
||
2020 |
Windows Server 2008 R2 Windows Server 2012 |
Revit Server Installation
Download the Standalone Installer from the table. Refer to the row corresponding to the installed version of Revit.
Note: Older versions of Revit Server can be installed through the regular Revit installer by selecting Tools & Utilities.
Extract the Installer.
Select Install and Accept the license agreement.
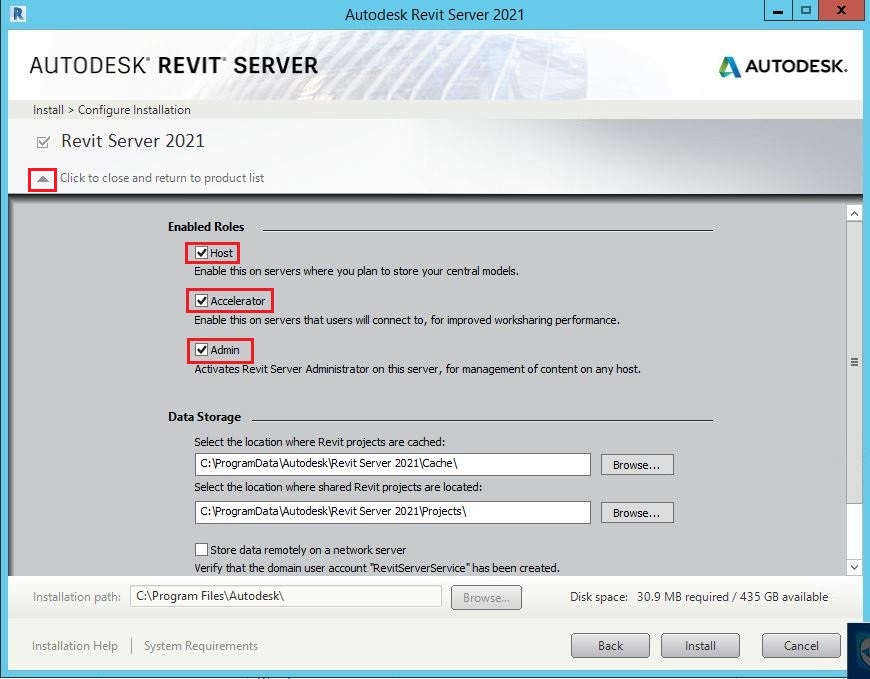
Under Enabled Roles, select one or more roles to be enabled for this instance of Revit Server. Click the drop-down arrow to prompt the installer to specify which roles to be enabled. By default, Accelerator will be the only role checked. When setting up the main Revit Server, check all three roles.
(Optional) Under Data Storage, accept the default locations for the Cache and Projects folders or select different ones. If the drive is modified, check if the path specified has access rights set to give Full control to the SYSTEM, Administrators, and CREATOR OWNER Windows accounts for the Cache and Projects folders (including subfolders and files).
(Optional) Under Data Storage, if using network-attached storage and have set up a RevitServerService domain user account (see System Requirements), select Store Data Remotely on a Network Server, and then enter the domain and password for that account.
Note: If opting to store data remotely, the paths for the Cache and Projects folders must be fully qualified UNC paths. Mapped drives will not be accepted.
Click Install.
Create primary RSN.ini File
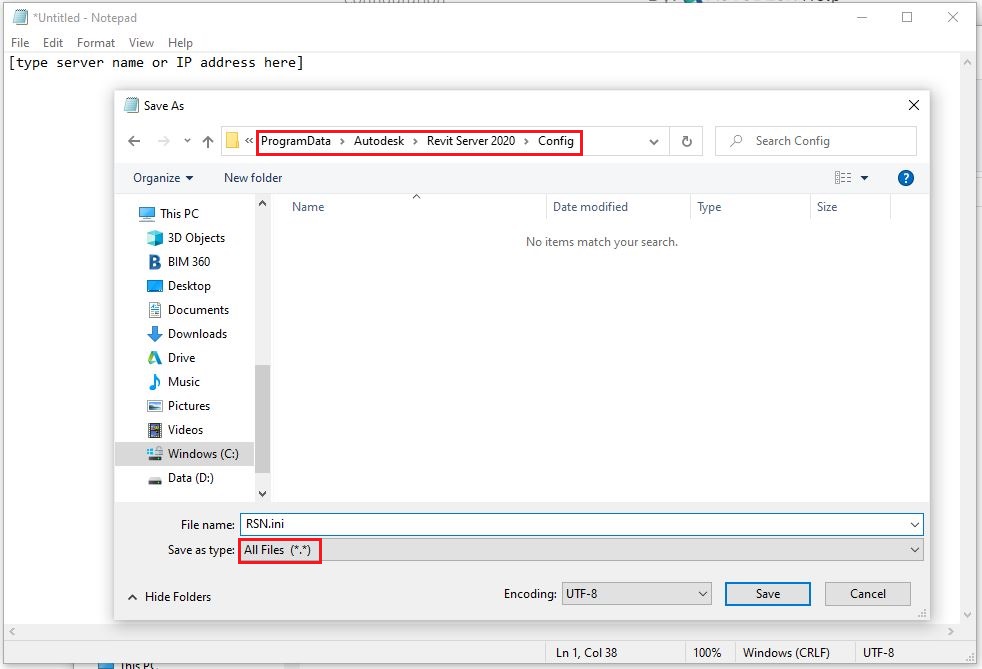
Open Notepad.
Create an RSN.ini file that includes the server's name or IP address for each instance of the Revit Server with the Host role enabled
Save the file here: C:\ProgramData\Autodesk\Revit Server <version>\Config\RSN.ini
Note: Deploy the RSN.ini file to every Revit workstation, Host, Accelerator, and Admin server for each Revit Server version.
(Optional) If using an Accelerator, the administrator can configure the Accelerator for users (rather than having them manually configure this within Revit) by setting the RSACCELERATOR#### (where #### is replaced by the version, for example, 2021) environment variable on each Revit workstation identifies the default Revit Server Accelerator through which the workstation will connect to the Revit Server Hosts.
Save Revit Files to Revit Server
Open the project file in the Revit version that matches the Revit Server installed.
Enable worksharing (if not already enabled).
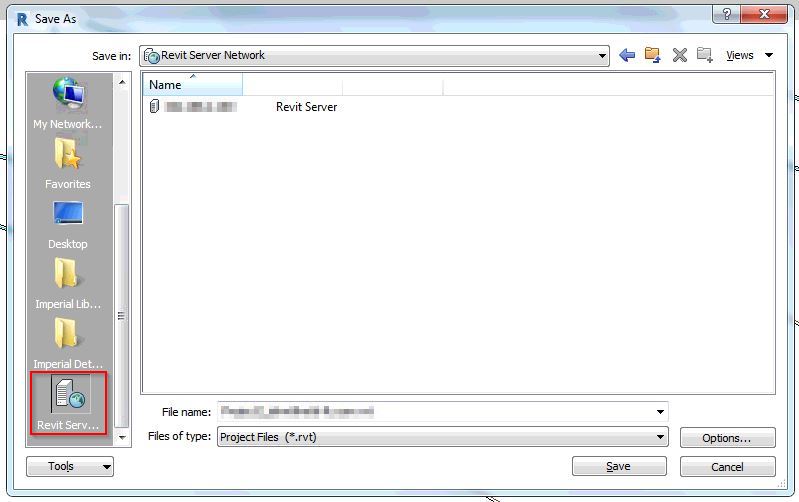
File > Save As > Project.
Select Revit Server.
Double-click the server name.
Provide a file name and save the Revit project file.
Post Installation
To check that the server is working correctly after installation, see the following article: How to check if an installation of Revit Server is working properly.