
Infill elements occur when a hosted element and its host do not have the same values for Phase Created and Phase Demolished.
If an insert (such as a window) and its host (such as a wall) do not have the same values for the Phase Created and Phase Demolished properties, Revit LT automatically places an infill element in the host to patch the hole created by the demolished insert.
The infill element lets you place inserts in one phase, demolish them, and then place new inserts in the same location. The infill element assumes the same structure as its host. In certain cases, you can modify the structure of the infill element by changing its type.
- Infill elements for roofs and floors project down from the top face.
- Infill elements for ceilings project up from the bottom face.
- You cannot drag, move, mirror, rotate, copy, or paste an infill element.
- To see an infill element, create a section view whose cut plane runs through the demolished insert and the host.
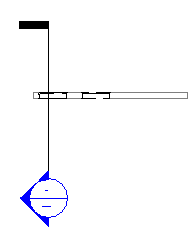
Sample section passing through wall and demolished window
Infill Elements for Earlier Phases
If you place an insert into a host in a phase later than the host's creation phase, Revit LT creates an infill element for earlier phases.
For example, you create a roof in Phase 1. You add a skylight to the roof in Phase 2. You look at the roof and skylight in a 3D view. If you set the 3D view's phase to Phase 1, an infill element replaces the skylight. You can view this infill element in a section view.
Infill Elements for Demolished Host Elements
When you demolish an insert in a host element, the insert becomes an infill element.
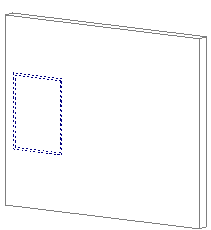
Demolished window becomes infill element
Next, you place a new insert near the demolished insert.
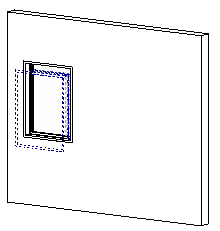
New window placed near demolished window
Then, if you apply a phase filter to the view that does not show demolished elements (such as Show Previous + New), you see only the new insert.
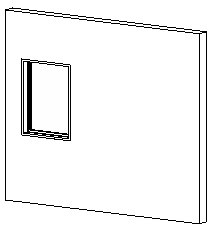
New window only