
Section and Beam Graphic - Toolbars
Description
The graphic toolbars allow the graphics display to be manipulated.
Unavailable commands are listed, but inactive and greyed.
For the section graphics there is a side toolbar in addition to the main graphics toolbars:
General sets grid, coordinates and interaction surface options.
For the beam graphics there are three specialist side toolbars:
General sets coordinates, axes, colour, style, transparency and scale factor.
Objects sets the visibility of objects within the graphics window.
Chart controls the display of results charts and graphs.
Outline Procedure
Right-clicking in any toolbar gives a variety of toolbar customisation options.
Toolbars may be locked or unlocked. If unlocked they may be repositioned or converted to floating by dragging and dropping to dock/undock them.
The F11 key brings the graphics window to the front of other windows.
The Edit Toolbar is only shown during editing of sections and bars/tendons.
Zooming to control the displayed scale of the structure model may be done using the mouse wheel when the graphics window is active (as an alternative to the zoom commands in the toolbar).
Graphic of the typical Toolbar

Graphic of the Edit Toolbar

Field Help
 Show Help
Displays this help.
F1 is a shortcut for this command.
 Print Preview
Displays and focuses on the Print Preview Form.
Print Previews opened using this command (i.e. from the Graphic) contains ONLY the graphic.
On closing the Print Preview Form control reverts to the Graphic.
 Page Setup
Displays and focuses on the Page Setup Form.
 Print Graphics
Displays and focuses on a standard windows Print form.
 Pan View
Switches the graphics cursor to a 'Drag' icon.
Pressing down the left mouse button when the mouse pointer is in the graphics window causes the currently displayed view of the structure to be dragged around the screen with every movement of the cursor. Releasing the button leaves the view at the last position it was dragged to.
Ctrl P is a shortcut for this command.
Panning mode can also be invoked by moving the mouse whilst holding down the mouse middle button. The mouse middle button assignment must be set to 'middle button' rather than ' universal scroll' for certain mouse drivers (under Control Panel | Mouse Properties).
 Fit View
Fits the current view of the objects within the graphics window at the largest scale possible.
Fit view can also be invoked by mouse middle button and the CTRL key. The mouse middle button assignment must be set to 'middle button' rather than ' universal scroll' for certain mouse drivers (under Control Panel | Mouse Properties).
F4 is a shortcut for this command.
 Zoom In
Clicking on this button magnifies the view.
F7 is a shortcut for this command.
Rolling the mouse wheel is an alternative option.
 Zoom Out
Clicking on this button reduces the scale of the view.
F8 is a shortcut for this command.
Rolling the mouse wheel is an alternative option.
 Zoom Window
Clicking on this button and moving to the graphic window causes a selection box cursor to be displayed. The mouse should be moved so that the 'cross' at the top-left of the selection box cursor is at one corner of the rectangle of interest. The left mouse button should then be clicked. The mouse should be moved to define the diagonally opposite corner of the rectangle of interest. Clicking the left mouse button again causes the selection box to close and the view to zoom in to include the extents of the viewing area that was defined by the selection box.
Ctrl W is a shortcut for this command.
 Dynamic View
Switches the graphics cursor to a 'Drag' icon.
Pressing down the left mouse button when the mouse pointer is in the graphics window causes the currently displayed view to be rotated in space around the mid-point of the objects in the view with every movement of the cursor. Releasing the button leaves the view at the last position it was dragged to.
F10 is a shortcut for this command.
Dynamic view mode can also be invoked by moving the mouse whilst holding down the mouse middle button and the SHIFT key. The mouse middle button assignment must be set to 'middle button' rather than ' universal scroll' for certain mouse drivers (under Control Panel | Mouse Properties).
The rotation direction can be reversed via the Options | Preferences | Graphics tab option 'Reverse Dynamic View spin direction'.
 Dynamic View (List)
Displays a menu:
| Command | Description |
|---|---|
| Dynamic F10 | As for Dynamic View (above) |
| Isometric | Offers viewpoints from the South west, South east, North east and North west. The created views look down at an angle of 45 degrees. |
| Elevation | Offers elevations from the East, South, West and North. |
| Plan Ctrl+F10 | Switches the display to plan and exits the menu. |
| More... | Displays a form showing the vector of the direction of the current view. The vector fields may be edited directly and the view in the graphic window is updated immediately to reflect every change made. Alternatively, a Rotation spinner allows the structure to be rotated. The two horizontal spin controllers cause rotation about the Z axis. The two vertical spin controllers cause rotation about the Y axis. |
 South West
Switches the display to South West elevation.
Shft + F10 is a shortcut for this command.
 South
South
Switches the display to South elevation.
 South East
Switches the display to South East elevation.
 Undo View Change
Reverts to the previous view.
(Enabled only if there is a previous view).
 Redo View Change
Recreates the original view.
(Enabled only if the view has been changed using 'Undo View Change').
 Snap
Snap
Displays a drop-down menu showing all the possible snap modes:-
| Command | Description |
|---|---|
| Grid | Snaps to the nearest grid point |
| Nearest | Snaps to the nearest defined point of any type |
| End Point | Snaps to the nearest end point of a line |
| Intersection | Snaps to the nearest intersection of lines |
| None | Snapping is disabled |
Clicking on one of these options causes the snap mode to be reset.
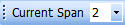 Current Span
Displays the Current Span (only available when editing a multiple span beam).
The current span may be changed by selecting from the drop-down menu of this icon.
(Alternatively, click on the beam in another span location).