Create a Jira Webhook (macOS)
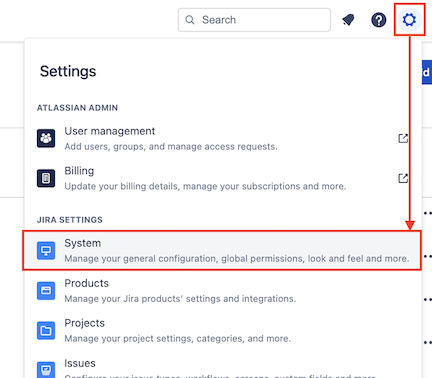
To create a Webhook in Jira, from the Settings menu select System.
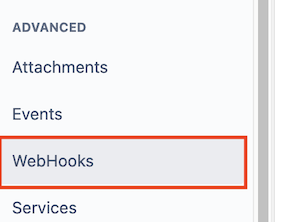
In the left-hand menu, under ADVANCED, select Webhooks.
From the Webhooks page, select the Create a Webhook button in the top right-hand corner of the page.

Fill in the information for the Webhook as follows:
| Field | Example | Notes |
|---|---|---|
| Name | Flow Production Tracking Jira Bridge | If you plan on having multiple projects, identify the webhook’s name with the project it will be used for |
| URL | https://<url_for_sg_jira_bridge>/jira2sg/default/issue/${issue.key} |
<url_for_sg_jira_bridge> is the host name or IP address of the system you will launch webapp.py or service.py from – see more on URL below |
| Description | Webhook that syncs Jira data with Flow Production Tracking using the Flow Production Tracking Jira Bridge | |
| JQL | project = "Your Project Name" | "Your Project Name" refers to your Jira Project. This field will autofill as you begin filling it in. |
| Events | [x] Issue: created, updated, deleted, [x] Comment: created, updated, deleted |
Webhook URL
For the webhook URL, you can use the IP address of the system from which you will launch webapp.py or service.py from.
In this guide, we are testing the Flow Production Tracking Jira Bridge from a local system. If you are testing on a machine not accessible to Jira, ie. testing locally, it's likely your machine isn't accessible from the Jira server, especially if you're using a Jira cloud server. To allow the Jira server to securely access your local machine for testing and development, you can use ngrok. Instructions to set up ngrok are included below.
Find your IP address
Find your IP address
To find your IP address, open a macOS Terminal by typing Command + Space Bar, typing the word Terminal, and hitting Return.

The Terminal will now be open.

Enter the following command into the Terminal.
curl ifconfig.meThe Terminal will now display 4 sets of numbers, separated by a period. This is your IP address. In the example below, the IP address is: 12.34.56.789

Installing ngrok for macOS
Set up ngrok for local testing
Install Homebrew
Developers use Homebrew to install various software packages on a Mac. Homebrew creates executables and installs them into a predictable location for your computer to execute later.
To install Homebrew, open a macOS Terminal by typing Command + Space Bar, typing the word Terminal, and hitting Return.

The Terminal will now be open.

Enter the following command into the Terminal.
/bin/bash -c "$(curl -fsSL https://raw.githubusercontent.com/Homebrew/install/HEAD/install.sh)"
Hit Return. You will now be prompted for your macOS password. Type the password.
Your password will not be displayed as you type! Type carefully. If you type your password in wrong, you will be prompted to try again.

After typing in your password, hit Return.
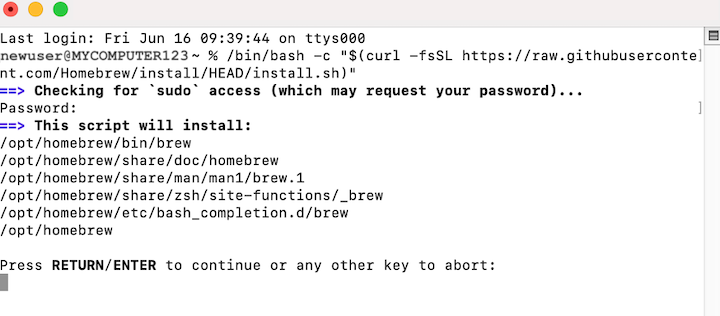
When prompted, hit Return to continue.
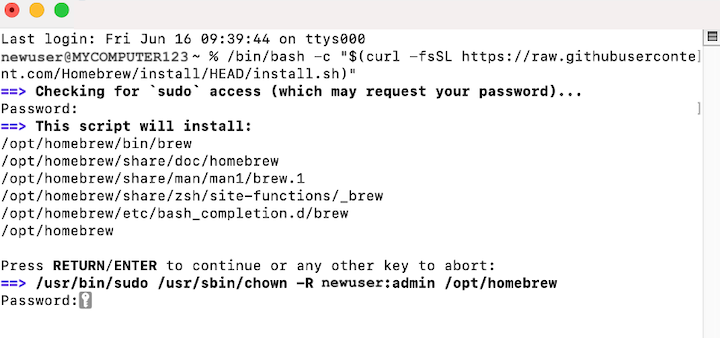
You will now be prompted to enter your macOS password again. Enter your password and hit Return.
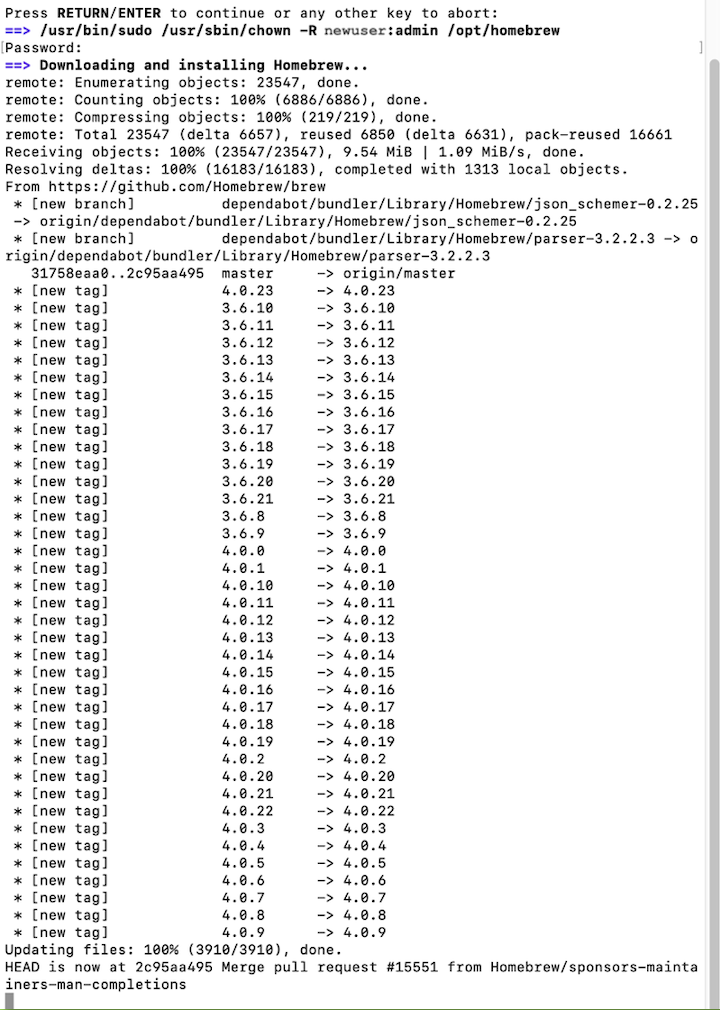
Wait several minutes. Once the download and install is complete, additional text will appear in the Terminal indicating that installation has been successful.
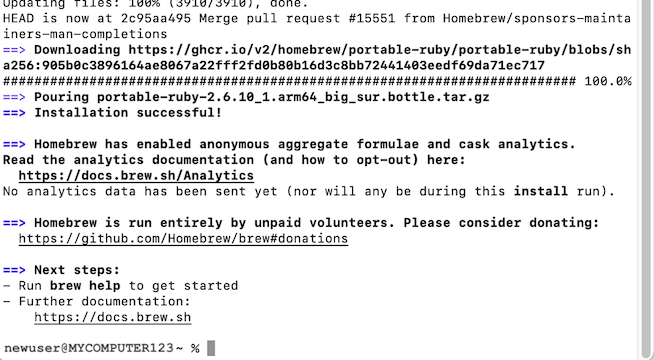
Homebrew is now installed.
Install ngrok
To install ngrok, open a Terminal and enter the following command.
brew install ngrok/ngrok/ngrokAllow a minute or two for ngrok to be installed. Once installed, go to https://ngrok.com and sign up for a free account.
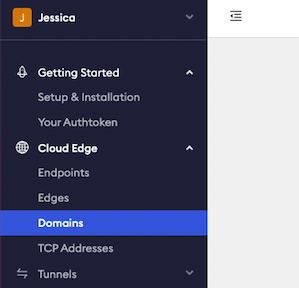
Once signed in, under Cloud Edge on the left-hand menu, select Domains.
Next, select + Create Domain.
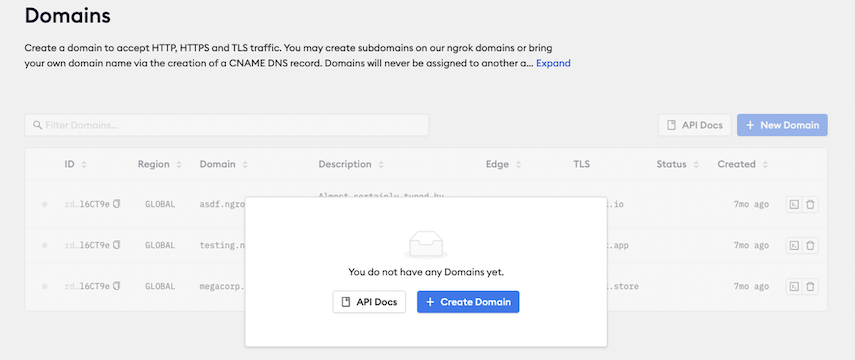
ngrok allows users one static domain for free. The URL will be randomly generated.
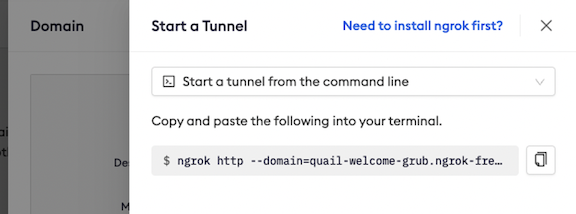
You can view your free domain anytime through ngrok's website.

With your domain created, find Your Authtoken on the left-hand menu.
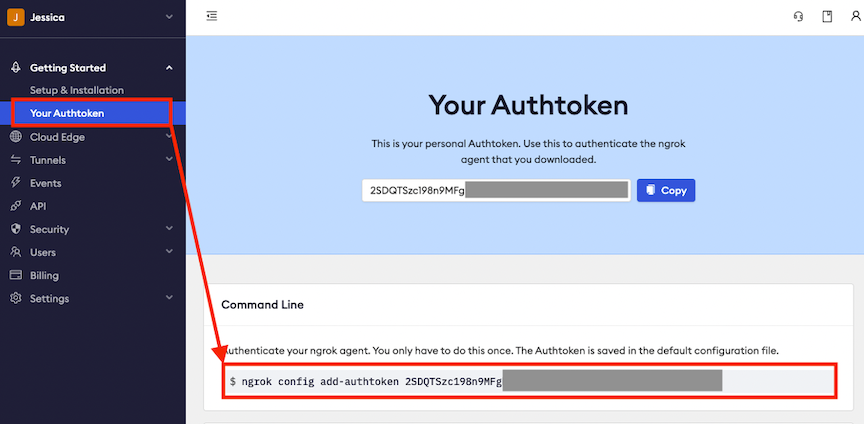
To authenticate your ngrok agent, enter the following command into the Terminal, replacing ReplaceThisWithYourAuthtoken with your token, or by copying the command from the ngrok website.
ngrok config add-authtoken ReplaceThisWithYourAuthtokenTo start ngrok, enter the following command into the Terminal, replacing the URL with the static URL you received from ngrok.
ngrok http domain=quail-welcome-grub.ngrok-free.app 80You should now see something that looks like this:

The static URL is what the Jira Webhook will start with.
If working locally, instead of a URL like this:
https://localhost:9090/jira2sg/default/issue/${issue.key}You will use a URL like this instead:
https://quail-welcome-grub.ngrok-free.app/jira2sg/default/issue/${issue.key}If using ngrok, add the URL to line 33 of the Flow Production Tracking Jira Bridge Credentials Cheat Sheet.
Create Webhook
Select Create at the bottom of the page to create the Webhook.
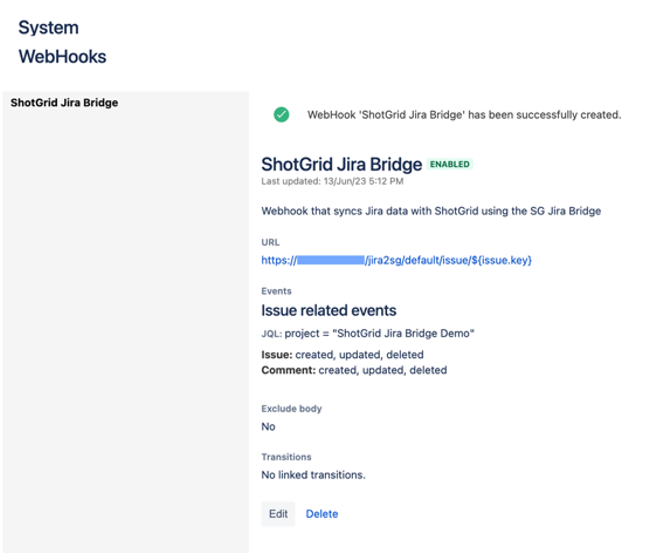
Add the Webhook Name, URL, Description and JQL to lines 32, 33, 34 and 35 of the Flow Production Tracking Jira Bridge Credentials Cheat Sheet.
If you customize the settings name used for the syncer on the bridge, then make certain to update the "default" in the URL to the settings name used for the syncer.
