This section gives step by step instructions for setting up the Vault server on Windows XP, Windows 7, Windows Server 2003, and Windows Server 2008.
If you are installing Autodesk Vault for the first time and do not expect to customize your installation, refer to the Quick Start Installation section.
Installation for Windows Server 2008
After choosing the data management server hardware. (see Hardware Requirements for recommended specifications), load Internet Information Services on this system
- On the Windows Start menu, select Programs ► Control Panel.
- On the Control Panel, double click Programs and Features.
- On the left side of the Programs and Features dialog box, select the option to Turn Windows Features on or off.
- Select Roles in the left pane.
- In the right pane select Add Role Services.
- Check Internet Information Services - in W2K8 R2 - Check Web Server (IIS).
- Expand Internet Information Services►Web Management Tools►IIS 6 Management Compatibility. - in W2K8 R2 - click Next twice.
- Turn on the check box for IIS Metabase and IIS 6 configuration compatibility. - in W2K8 R2 - Turn on the check box for Management Service and IIS 6 Management Compatibility.
- Expand Internet Information Services► World Wide Web Services ►Application Development Features. - in W2K8 R2 - go to Application Development.
- Turn on the check box for ASP .NET. Three other settings are automatically turned on: .NET Extensibility, ISAPI Extensions, and ISAPI Filters.

- - in W2K8 R2 -

Now that IIS is installed you can configure the firewall that is built into Windows Server 2008, if necessary.
- On the Windows Start menu, select Programs ► Control Panel
- On the Control Panel, double click Windows Firewall
- If the Firewall strip says "Windows Firewall is helping to protect your computer," then click Change settings.

- - in W2K8 R2 - If the Windows Firewall state is "On" then click on the left side Advanced settings.

On the left side click Inbound Rules, then in the right pane click New Rule. Choose Port, type 80 in Specific local ports, use default settings twice, type Vault into Name and Finish. Go to Install Autodesk Vault Server.
- In the Windows Firewall dialog box, click the Exceptions tab, and then click Add Port.

- Click OK.

Install Autodesk Vault Server
Once the firewall is configured to allow Vault to communicate properly, run the installation from the Autodesk Vault server media.
- Insert the Installation media and double-click the setup.exe.
- Choose Install Products.
- Accept the License Agreement.
- Fill in license server information.
- Choose Autodesk Vault [year] (Server).
- Click the down arrow under the Vault Server selection to customize your installation.
 The configuration screen allows you to make the following changes:
- Select whether you want to use a local database or a remote database.
- Change the location of the SQL installation. You can change the SQL database location, and the location for the Autodesk Vault server console application. Note: We recommend that you take the default locations unless you are setting up a remote site. For more information on Multi-Site setups see Setting Up Multiple Site Environments.
- Update any service packs, if available.
- Finish customizing your installation and click Install.
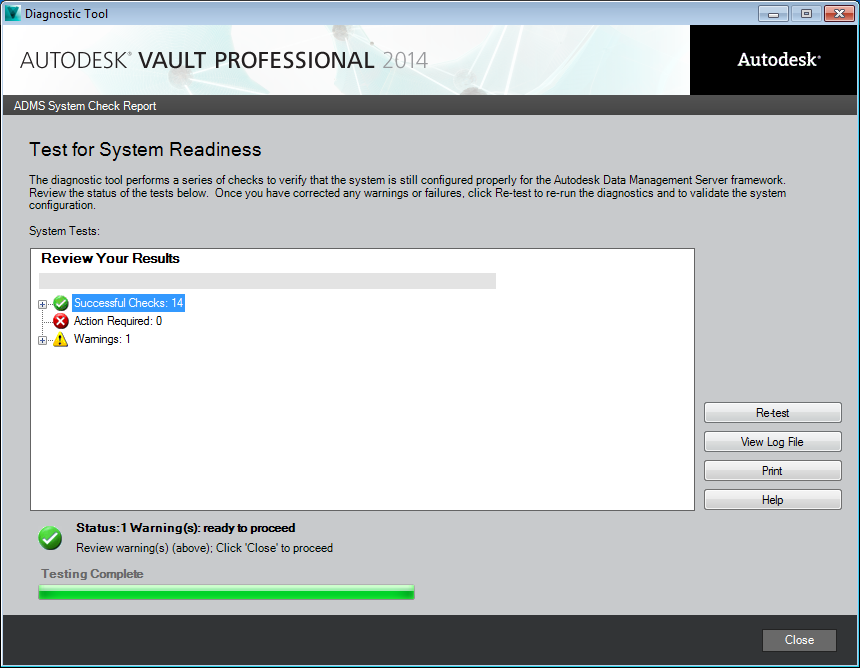
- The installation performs a series of installation pre-checks. If your system does not pass the installation pre-checks, a dialog box displays failures and warnings. Use the installation help and information in Troubleshooting.
If it does pass all pre-checks, click the Continue button to complete the installation.
Installation for Windows Server 2003
After choosing the data management server hardware. (see Hardware Requirements for recommended specifications), load Internet Information Services on this system
- From the Windows Start menu, select Programs ► Control Panel ► Add or Remove Programs
- On the left side of the Add or Remove Programs dialog box, select the option to Add/Remove Windows Components
- Select and check Application Services and click the Details button
- Check the ASP .NET option. This action causes the boxes for Enable network COM+ access and Internet Information Services to be checked as well.

- Next button. You can possibly be prompted for your Windows server 2003 CD.
Once the IIS is configured, run the installation from the Autodesk Vault server media.
- Insert the Installation media and double-click the setup.exe.
- Choose Install Products.
- Accept the License Agreement.
- Fill in license server information.
- Choose Autodesk Vault [year] (Server).
- Click the down arrow under the Vault Server selection to customize your installation. The configuration screen allows you to make the following changes:
- Select whether you want to use a local database or a remote database.
- Change the location of the SQL installation. You can change the SQL database location, and the location for the Autodesk Vault server console application. Note: We recommend that you take the default locations unless you are setting up a remote site. For more information on Multi-Site setups see Setting Up Multiple Site Environments.
- Update any service packs, if available.
- Finish customizing your installation and click Install.
- The installation performs a series of installation pre-checks. If your system does not pass the installation pre-checks, a dialog box displays failures and warnings. Use the installation help and information in Troubleshooting.
If all pre-checks pass, click Continue to complete the installation.
Installation for Windows 7
After choosing the data management server hardware (see Hardware Requirements for recommended specifications), confirm Internet Information Services settings on this system. If IIS is not loaded the Vault server installation will install IIS.
- From the Windows Start menu, select Control Panel.
- From the Control Panel, click Programs and Features.
- On the left side of the Programs and Features dialog box, select the option to Turn Windows Features on or off.
- Check Internet Information Services.
- Expand Internet Information Services►Web Management Tools►IIS six Management Compatibility.
- Turn on the check box for IIS Metabase and IIS 6 configuration compatibility.
- Expand Internet Information Services► World Wide Web Services ►Application Development Features.
- Turn on the check box for ASP .NET. Three other settings are automatically turned on: .NET Extensibility, ISAPI Extensions, and ISAPI Filters.
Now that IIS is installed, configure the firewall that is built into Windows 7, if necessary.
- On the Windows Start menu, select Control Panel.
- On the Control Panel, double click Windows Firewall.
- If the Firewall strip says that "Windows Firewall is helping to protect your computer," then click Advance settings on the left side of the Windows Firewall dialog box.
- In the Windows Firewall with Advanxw security dialog box, click tInbound Rules, located in the left pane.
- From the Action pulldown menu select New Rule.
- Select Port and click Next.
- In the Protocol and Ports dialog box, enter: Specific local ports: 80
- In the Action dialog box select Allow the connection and click Next.
- In the Profile dialog box select all the listed profiles and click Next.
- In the Name dialog box enter the a name for this new rule. To keep things simple you can call this new rule Vault. Adding a description is optional.
- Click Finish
Once the firewall is configured to allow Vault to communicate properly, run the installation from the Autodesk Vault Server media.
- Insert the Installation media and double-click the setup.exe.
- Choose Install Products.
- Accept the License Agreement.
- Fill in license server information.
- Choose Autodesk Vault [year] (Server).
- Click the down arrow under the Vault Server selection to customize your installation. The configuration screen allows you to make the following changes:
- Select whether you want to use a local database or a remote database.
- Change the location of the SQL installation. You can change the SQL database location, and the location for the Autodesk Vault server console application.
- Update any service packs, if available.
- Finish customizing your installation and click Install.
- The installation performs a series of installation pre-checks. If your system does not pass the installation prechecks a dialog box displays failures and warnings. Use the installation help and information in Troubleshooting.
If all pre-checks pass, click Continue to complete the installation.
Installation for Windows XP
After you choose the data management server hardware (see Hardware Requirements for recommended specifications), load Internet Information Services on this system.
- From the Windows Start menu, select Programs ► Control Panel.
- From the Control Panel, double-click Add or Remove Programs.
- On the left side of the Add or Remove Programs dialog box, select the option to Add/Remove Windows Components.
- Check Internet Information Services (IIS) and click the Next button. You can possibly be prompted for your Windows XP CD.

Now that IIS is installed, configure the firewall that is built into Windows XP.
- From the Windows Start menu, select Programs ► Control Panel.
- From the Control Panel, double click Security Center.
- If the Firewall strip says on then click the firewall icon at the bottom of the dialog box.
- In the Windows Firewall dialog box, click the Exceptions tab, and then click Add Port.
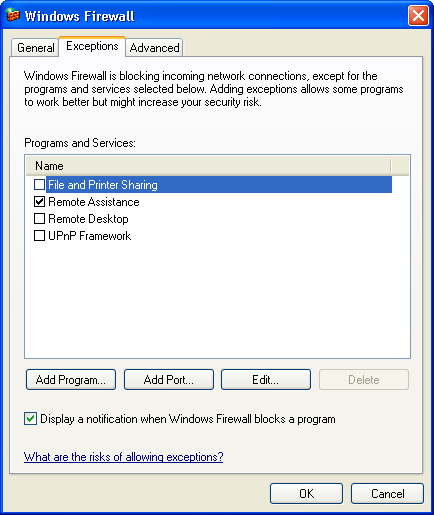
- In the Add a Port dialog box, enter values Name: Vault, Port number: 80. Select TCP.

- Click OK.
Note: If you are not running Windows XP Firewall you can skip this step.
Once the firewall is configured to allow Vault to communicate properly, run the installation from the Autodesk Vault server media.
- Insert the Installation media and double-click the setup.exe.
- Choose Install Products.
- Accept the License Agreement.
- Fill in license server information.
- Choose Autodesk Vault [year] (Server).
- The configuration screen allows you to change the location of the SQL installation. You can change the SQL database location, and the location for the Autodesk Vault server console application. Note: We recommend that you take the default locations unless you are setting up a remote site. For more information on Multi-Site setups see Setting Up Multiple Site Environments.
- Click Install.
- The installation performs a series of installation pre-checks. If your system does not pass the installation prechecks a dialog box displays failures and warnings. Use the installation help and information in Troubleshooting.