Create a group to review the proposal
Autodesk InfraWorks 360 (InfraWorks 360 ) is a cloud-based service that lets you securely share your models and proposals with specific groups of people, or with the general public. If you are an account administrator, you can create InfraWorks 360 groups and invite members to them.
The invitation is sent via an email message. When you receive an invitation to a group, you must accept it in Autodesk InfraWorks 360.
Create an InfraWorks 360 group
- Log in and add the new group.
- From the Start page, Sign in to Autodesk InfraWorks 360.
Enter your Autodesk credentials.
- Click OK.
InfraWorks 360 adds you as group's default Admin, shows Users (1).
- From the Start page, Sign in to Autodesk InfraWorks 360.
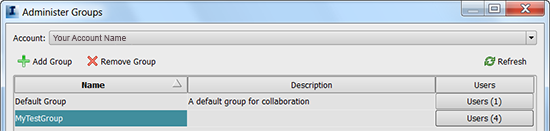
- Click Administer Groups.
- In the Administer Groups dialog box, click Add Group (
 ). Note: If you administer more than one account, select the Account from the pull-down menu.
 - Enter a name for the group and click OK.
Panel redisplays showing name of new group with Users (0).
- Click OK.
InfraWorks 360 adds you as group's default Admin, shows Users (1).
Remember: InfraWorks 360 creates a default group with you as Admin when you create an Admin account.
Add users to the group and assign their roles.
- From the Start page, click Assign Users To Groups. Note: Or, from Administer Accounts, click the Users field.
- Click Add User (). Enter the email address associated with the account for this group member.
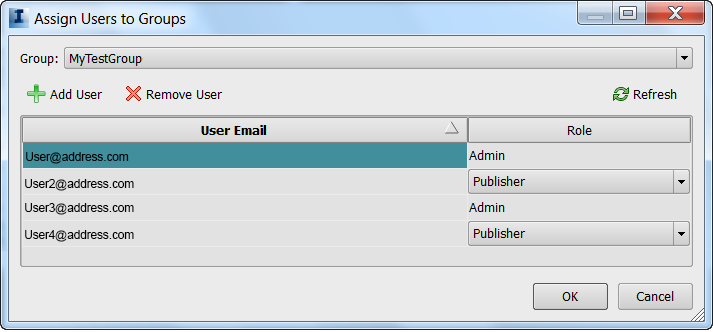
- Specify the role for this user.
For more information about user roles, see To add users to design groups and assign them roles.
- If desired, edit the invitation text for this group.
- Click OK in both dialog boxes to finish.
The invitation is created and sent using your email program.
When you publish a scenario containing your proposal to this group, the group members can view and collaborate on it.
Accept an invitation to a group
- Click the pending invitation on the Start page.
- In the Groups dialog box, click the green check mark to accept the invitation.
- Optionally, make the new group your default by selecting it from Set Default Group.