In this section, you generate the core and cavity.
After the workpiece, patching surfaces, and runoff surface have been created, the Generate Core/Cavity command is used to split the workpiece into the core and cavity. Mold Design also provides a method of importing an existing core and cavity that was created by another design team or by using another CAD system.
- On the ribbon, click Core/Cavity tab > Parting Design panel > Generate Core and Cavity
 .
. - In the Generate Core and Cavity dialog box, select Preview/Diagnose. The bodies appear in the defined color.Note: Notice the Opacity Settings controls for the Core Body and Cavity Body that allow you to change the transparency of each body. Notice the Repair Tolerance setting which can repair small gaps. We will not change either of these areas.
- Select the Body Separation slider and move it to the right until it displays a value of 75.
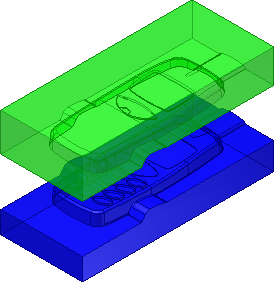
The core and cavity preview updates as you move the slider. The following image displays the preview of the separated bodies.

- Click the Parting Diagnostics tab. In an actual design, the problems detected should be fixed. None of the problems listed cause the core and cavity generation to fail.
- Click OK to generate the core and cavity.
- Click OK to accept the default file names and location on the file naming dialog box. Notice that core files are appended with an _CR and the cavity files are appended with an _CV in the default naming scheme.
- Select Finish Core/Cavity to return to the parent assembly.
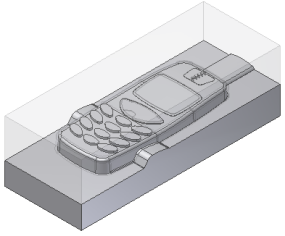
The core and cavity are automatically generated, as shown in the following image.The system removes the driving moldable part and the workpiece from the display, and the core/cavity is now shown with the cavity displayed in a translucent style.
The browser displays the Core Cavity node. The About this tutorial tutorial will further explain the mold assembly file structure.

We will not edit the core cavity in this exercise. To edit the core and cavity, right-click the Core Cavity node in the browser and select Edit Feature.
To delete the core and cavity, right-click the Core Cavity node in the Mold Design browser and then click Delete. In this tutorial, the core and cavity remains in the model and you continue working with it.