In this section, you create a mold base by using one of the standard mold bases supplied.
The mold base is an assembly of steel plates that contains the cores and cavities of a mold. You can place a standard mold base by selecting from a library of vendor mold bases, such as DME, HASCO, Futaba, and LKM. Or, you can customize any of the standard mold base types.
- On the ribbon, click Mold Assembly tab > Mold Assembly panel > Mold Base
 .
. - In the Mold Base dialog box, select the FUTABA SA-S Vendor and Type.
- Select the 250 mm x 250 mm mold base size. Note: The default size provides a recommendation based on the dimensions displayed under Layout Information.
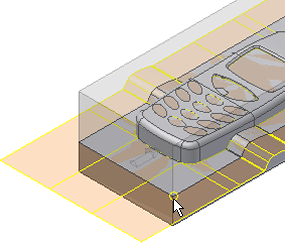
- Select the Placement Ref Point in the graphics window, as shown in the following image.

- Expand the Mold Base dialog box by clicking the arrows at the top or bottom of the right-hand side of the dialog box.
- In the Components list, click SA-S-AP 250X250X60.
- Click Property Settings
 on the right of the selected component in the Component list .
 - From the Parameters list of the SA-S-AP dialog box, modify the H_ value to 70 mm.
- Click OK on the SA-S-AP dialog box.
- Click OK on the Mold Base dialog box.
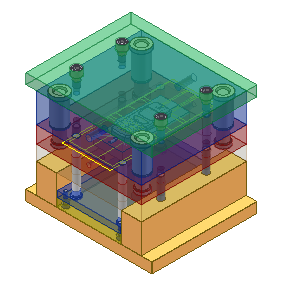
- To generate the mold base and close the dialog box, accept the defaults in the File Naming dialog box and click OK. The full mold base assembly appears as shown in the following image.

- On the Quick Access toolbar, click Save
 . The mold assembly is comprised of many subassemblies and part files. The About this tutorial tutorial explains the structure of the mold assembly.
 - Click OK on the Save dialog box to save the assembly and its dependents.