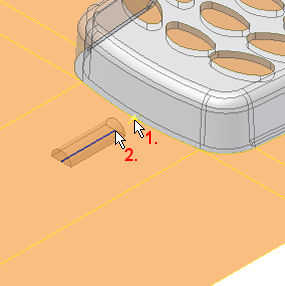
In this section, you create a gate location.
- On the ribbon, click Mold Layout tab > Runners and Channels panel > Gate
 .
. - Maintain the default type of gate, which is Edge.
- Change the Placement option from One Point to Two Points.
- Change the Placement option for the gate so that it is on the Cavity Side.
- Change the values for the gate by entering new values for the following parameters:
- W1 = 7 mm
- H1 = 3.5 mm
- W2 = 3.5 mm
- H2 = 2 mm
Note: The available parameters vary, depending on the type of gate that is being created. - Activate the Gate Location selection tool in the Create Gate dialog box, and select the gate location point. The End point selection tool automatically becomes active. Select the end of the sketched line as the end point, as shown in the following image.

- Click OK to close the Create Gate dialog box. The gate appears as shown in the following image.
