 |
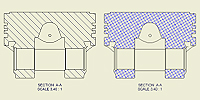
Modifies the hatch pattern for an area. When you create a section view, hatching is automatically applied using the defaults specified by the active drafting standard. |
|
Access: |
Ribbon:
Place Views tab
 Create panel
 Section
Right-click the hatch pattern area in a cut view, and then select Edit. |
|
By Material |
If selected, the hatch pattern corresponds to the mapping between materials and hatch patterns defined in the Standard style. Tip: To change the mapping, open the Style and Standard Editor. Then change the settings on the Material Hatch Pattern Defaults tab of the Standard style pane.
|
|
Pattern |
Selects the hatch pattern. Click the arrow and choose a hatch pattern from the list. Select Other to add a hatch pattern to the Pattern list. Then add the hatch pattern using the Select Hatch Pattern dialog box. |
|
Angle |
Rotates the hatch pattern by the specified angle. Enter the desired angle. |
|
Line Weight |
Sets the thickness of the hatch lines. Click the arrow, and then choose the thickness from the list. |
|
Scale |
Sets the distance between lines in the hatch. A scale of 1 uses the original distance specified in the hatch pattern. A scale of 0.5 results in line spacing that is one half of the original distance. |
|
Shift |
Shifts the hatch pattern to offset it slightly from the original hatch pattern position. Enter the distance for the shift. |
|
Color |
Changes the color of the hatch lines. Click Color, and then select the color. |
|
Double |
Creates a copy of the specified hatch pattern perpendicular to the first hatch pattern. |