- On the ribbon, click
Sketch tab
 Insert panel
 ACAD
ACAD
 .
. - Select eBox2.dwg, and then click Open. The Layers and Objects Import Options dialog box opens.
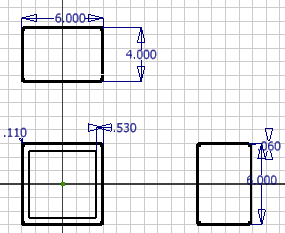
- In the Selective Import field, remove the check marks next to the c and c dim layers, and then check the b and b dim layers.
- Ensure that All is selected in the Selection field.
- Click Finish. The program imports the geometry and dimensions on the specified layers into the sketch.
 Note: The colors of your sketch lines could be different from the image. Differences in color are not important for this tutorial.
Note: If a dialog box appears prompting you to choose a translator, select Translator: DWG and click the OK button.