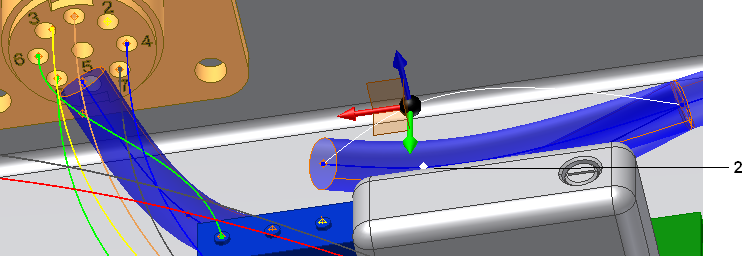
Use 3D Move/Rotate to adjust a work point for the segment branch.
- To get a better view of your data, turn off the visibility for any geometry obstructing your view.
- In the graphics window, right-click the second branch work point (2) as shown in the following illustration.
- Right-click and select 3D/Move Rotate from the context menu.
- Drag the point vertically until the preview looks like the following shape, right-click, and select Apply.

- Continue adjusting until you are satisfied with the shape, right-click, and select OK.
 Note: Once a segment is created, you can verify whether any points along the segment violate the bend radius value. In the browser, right-click the segment then select Bend Radius
 Check from the context menu. Verify that the bend radius multiplier is set before checking the points. Select “bend radius, check” in the Help index for more details on bend radius checking.
 - Save the harness assembly.