Create a two plate tool, and generate the feed system for the models in the family mold.
- Click
 . The Set Parting Plane dialog appears and the model is oriented to a bottom view.
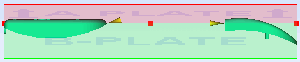
- Enter 28 mm in the Z depth of plane box, then click Apply to move the parting plane, as shown below.
- Click Close to exit the Set Parting Plane dialog. We will use the default mold properties for this tutorial.
- Click
 . The Mold Properties dialog appears.
- In the Plate thickness section, set the following values:
A Plate: 75 mm
B Plate: 75 mm
- Click OK to apply your changes and exit the Mold Properties dialog.
- Now that the parting plane and mold properties have been set, you can create the runner system for your mold. Click
 . The Runner system wizard dialog appears.
- In the Sprue section,
- Enter -70 in the X text box, and 45 in the Y text box to set the sprue position.
- Click
 Browse to the right of the Properties text-box. The sprue definition dialog appears.
- Select
|
Sprue type:
|
Cold |
|
Sprue shape:
|
Circular Tapered |
|
Start diameter (1):
|
3 |
|
End diameter (2):
|
6 |
- Click OK to apply your changes and return to the Runner system wizard dialog, or Close if the properties don't need to be changed.
- In the Runners section,
- Click Browse to the right of the Properties text-box. The runner definition dialog appears.
- Select
|
Runner type:
|
Cold |
|
Runner shape:
|
Circular |
|
Diameter (1):
|
5 |
- Click OK to apply your changes and return to the Runner system wizard dialog, or Close if the properties don't need to be changed.
- In the Gates section,
- Click Browse to the right of the Properties text-box. The gate definition dialog appears.
- Select
|
Gate type:
|
Cold |
|
Gate shape:
|
Rectangular |
|
Width (1):
|
3 |
|
Thickness (2):
|
1 |
|
Orientation:
|
Horizontal by length |
|
Horizontal length:
|
4 |
- Click OK to apply your changes and return to the Runner system wizard dialog, or Close if the properties don't need to be changed.
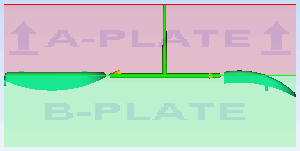
- In the Runner System Wizard dialog, select
Star
from the Layout drop-down menu.
- Click OK. The runner system is created.
In the next task, you will test the developed runner system.