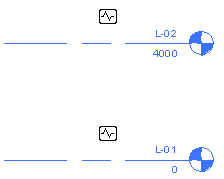
You can copy levels from a linked model to the current project, and monitor them for changes. See Copy/Monitor Overview.
For instructions on copying other types of elements for monitoring, see Copying Elements for Monitoring.
To copy levels for monitoring
- Open an existing project or start a new project.
You will copy levels from a Revit model to this project.
- Prepare a view:
- Open an elevation view.
- In the view properties, for Discipline, select Coordination.
This setting ensures that the view displays elements for all disciplines (architectural, structural, mechanical, and electrical).
- Delete existing levels from the current project.
When you delete existing levels, Revit also deletes corresponding plan views for the deleted levels. You will create new plan views based on the copied levels.
Note: For Revit Architecture and Revit Structure, you can delete all but one level. Change the name of this level to Original Level, and change its extents (far to the left or right of the drawing area) so that you can distinguish it from a copied level and delete it later. - Link the model into the current project.
- Pin the linked model in place, so that it cannot be moved inadvertently.
How to
- In the drawing area, select the linked model. Tip: Move the cursor over the linked model in the drawing area. When its boundary is highlighted, click to select it.
- Click Modify | RVT Links tab
 Modify panel
 (Pin).
- In the drawing area, select the linked model.
- (Optional) Display the linked model in halftone, so that you can distinguish its elements from elements in the current project.
- Start the Copy/Monitor tool:
- Click Collaborate tab
 Coordinate panel
 Copy/Monitor drop-down
 (Select Link).
 - Select the linked model in the drawing area.
- Click Collaborate tab
- Specify options for the levels to copy.
For example, you can specify an offset for levels, or add a prefix or suffix to level names. See Specifying Options for Copy/Monitor.
- Copy the levels for monitoring:
- Click Copy/Monitor tab
 Tools panel
 (Copy).
 - In the linked model, select the levels to copy.
To select multiple levels, on the Options Bar, select Multiple. Then select the levels in the drawing area, and click Finish on the Options Bar.
You can use a selection box and a filter to select all levels in the linked model. See Selecting Elements Using a Filter.
- Click Copy/Monitor tab
 Copy/Monitor panel
 (Finish).
The copied levels now display in the current project.
When you select a copied level, the monitor icon
 displays next to it to indicate that it has a relationship with the original level in the linked model.
If the levels are moved, changed, or deleted in the linked model, you are notified of the changes when you open the current project or reload the linked model. These warnings also display in a coordination review. (See Coordination Review.)
- Click Copy/Monitor tab
- In the Revit Architecture project and the Revit Structure project, delete the remaining original level from the current project.
When you delete the level, Revit also deletes the related plan view.
Note: When you delete the final level in a Revit Architecture project, the site view is also deleted. For instructions on creating a new site view, see Site Plan Was Deleted. - Create plan views for the new levels:
- Click View tab
 Create panel
 Plan Views drop-down, and select the desired type of plan view.
 - In the New Plan dialog, select one or more levels from the list, and click OK.
- (Optional) Repeat this process to create other types of plan views.
For Revit Structure, create analytical plans that correspond to the structural plans. See Applying an Analytical View Template for Steel Elements.
The plan view names display in the Project Browser. To rename a view, right-click the view name, and click Rename.
- Click View tab
- (Optional) Hide the linked model.