Sketching a run is the easiest way to create stairs. The boundaries and risers are generated automatically as you sketch the run. When you finish the sketch, a railing is applied automatically. The Run tool limits the design of your stairs to straight runs, straight runs with landings, and spiral staircases. For more control when designing stairs, sketch the run by sketching the boundary and riser lines.
To sketch a run
- Open a plan or 3D view.
- Click Architecture tab
 Circulation panelStair drop-down
 (Stair by Sketch).
 - Click Modify | Create Stairs Sketch tabDraw panel
 Run.
Run. The Line tool
 is selected by default. Select a different tool on the Draw panel if desired.
 - Click to start the run.
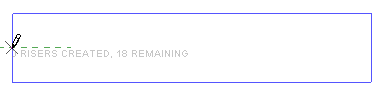
Click start point on left side
- Click to end the run.
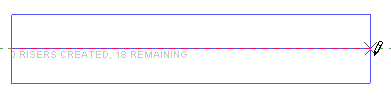
Click endpoint on right end
- Optionally, specify a railing type for the stair. See Specifying the Railing Type for New Stairs.
- Click
 (Finish Edit Mode).
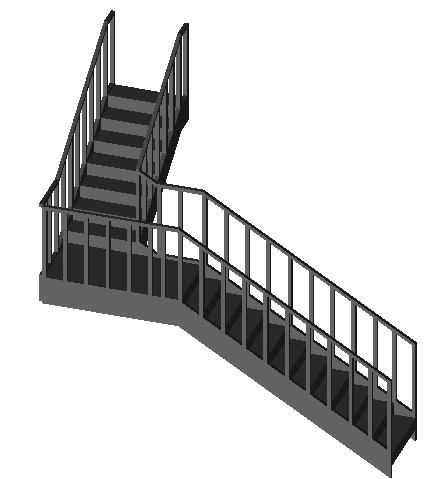
Completed stairs in 3D with default railings and balusters
To create stairs with a landing
- Click Architecture tabCirculation panelStair drop-down (Stair by Sketch).
- Click Modify | Create Stairs Sketch tabDraw panel Run.
The Line tool
is selected by default. Select a different tool on the Draw panel if desired. - Click to start the run.
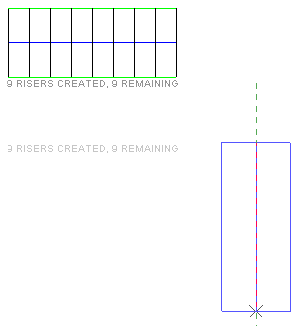
- Click to position the landing when the desired number of risers have been reached.
- Drag the cursor along the extension line and click to start drawing the remaining risers.
- Click to finish the remaining risers.
- Click (Finish Edit Mode).
Example

First run of stairs- 9 risers created with 9 remaining
Additional run of stairs perpendicular to the original

Completed sketch with landing created automatically
To modify a run of stairs
- Select the stairs.
- Click Modify | Stairs tabMode panel
 Edit Sketch.
 - Click Modify | Stairs > Edit Sketch tabDraw panel, and select the appropriate drawing tool to make your changes.
You can modify a stair footprint that you have sketched using one of the drawing tools.
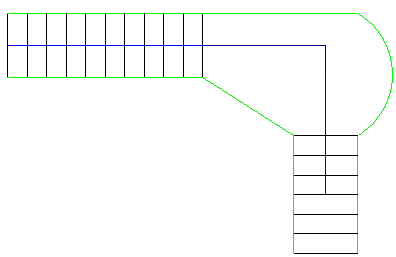
Example
In the following image, the sketch of the landing was modified using the Start-End-Radius Arc drawing tool
Modifying a run of stairs
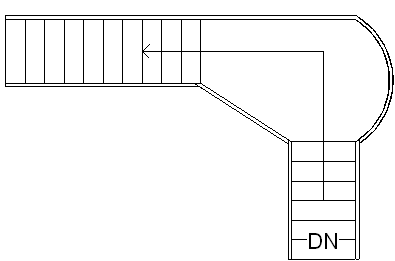
Finished sketch with landing modified
Also, you can modify the stairs you sketched by changing their instance properties on the Properties palette. To access the type properties, click ![]() Edit Type on the Properties palette.
Edit Type on the Properties palette.
For a description of stair properties and their values, see Stair Properties.