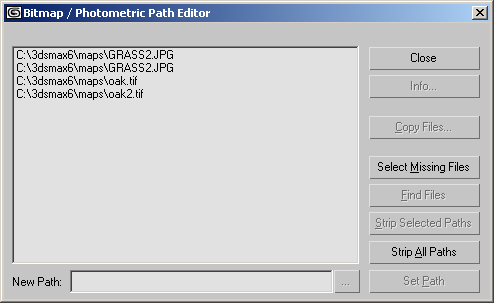
This dialog is the main part of the interface to the Bitmap / Photometric Path Editor utility.
Procedures
To correct the path name for a missing map:
- On the Bitmap / Photometric Path Editor dialog, click Select Missing Files.
- Click to select a single missing file in the list.
If a group of missing files are in the same directory, you can leave all of them selected.
- Click Strip Selected Paths.
- Click Set Path.
- Enter the correct path in the New Path field, or click the "..." button to browse to the correct path in a Windows file dialog.
The Bitmap/Photometric Path Editor updates the selected maps' path to use the new path.
You must first locate the missing bitmap or photometric files. The Windows Search program can help you with this.
Interface

- List of maps and photometric files
-
Shows all bitmaps and photometric files (IES, CIBSE, LTLI) used in the scene, along with their current path.
When no file is selected in the list, the only controls available in the dialog are Close, Select Missing Maps, and Strip All Paths.
- Close
-
Click to close the dialog.
- Info
-
Click to display a Resource Information dialog.
This button is available only when a single file is selected in the list.
Double-clicking a name in the list is another way to display the Resource Information dialog.
- Copy Files
-
Copies the selected files to a directory you choose. This button displays a Windows file dialog that lets you choose the destination directory.
- Select Missing Files
-
Highlights the names of missing files in the list.
- Find Files
-
Click to search for the maps or photometric files in the current selection. This button displays an alert that shows how many files are findable, how many files are missing.
- Strip Selected Paths
-
Click to strip the path from the selected files. An alert appears to warn you that the scene will lose this information.
- Strip All Paths
-
Click to strip the path from all files in the list. An alert appears to warn you that the scene will lose this information.
- Set Path
-
Click to apply the New Path field to the selected files.
If the New Path field is identical to the selected file or files, clicking Set Path clears New Path.
- New Path
-
Lets you enter a path for the currently selected file or files. Default=The path of the currently selected file, or none if multiple files with differing paths are selected.
 [browse]
-
(To the right of the New Path field.) Displays a Windows file dialog to let you browse for a path.