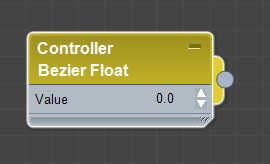
In addition to materials and maps, the Material/Map Browser panel has entries for controllers, allowing you to animate materials.

Example of a controller node
You can use a single animated value to control multiple parameters.
To use a controller node, add it to the active View by dragging it from the Material/Map Browser, or double-clicking its Browser entry. Then wire the controller to the material or map parameter that you want to animate. Although by default the Slate Material Editor doesn’t show “additional parameters that can’t be mapped, when you use controllers, you probably want to display these: see Show/Hide Slots.
When you map the components of a Standard material, the Slate Material Editor automatically adds appropriate controller nodes. For example, when you wire a Bitmap to the material’s Diffuse Color component, a Bezier Float controller for the Diffuse Color Amount parameter is also present. To see these controllers, you need to display the Additional Parameters (right-click the material node, then choose Show All Additional Params).

Controller nodes wired to (nonmappable) scalar parameters
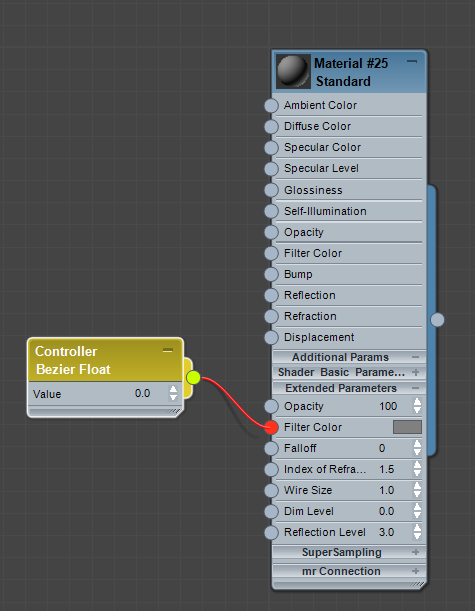
When you wire nodes, and the input socket you choose isn’t appropriate for the output being wired, 3ds Max displays the socket in red, and doesn’t complete the wiring. This can happen with maps as well, but it happens more often for controllers. In the illustration, for example, the controller generates a single scalar value, so you can’t use it to control a three-value setting such as a color.

Attempting to wire a 1-value output to a 3-value input
Animating Controller Values
Controllers provide a number of ways to animate the settings of a material or map. Most of these methods are standard 3ds Max techniques:
- Turn on
 (Auto Key) then at various frames, change the controller value. Note: Unless the material is applied to an object in the scene that is currently selected, you won’t see the new keys on the track bar.
 - Turn on
 (Set Key), then at various frames, change the controller value and then right-click the node and choose Add Key to create a key for the controller value.
 With this method, you use right-click
 Add Key instead of
  (Set Keys), because by default, the button sets only transform keys. Note: Unless the material is applied to an object in the scene that is currently selected, you won’t see the new keys on the track bar.
 - Use the controller’s properties dialog, if it has one, to set up animation. Tip: To see the properties dialog, right-click the controller node.
- Use Track View to adjust the animation. Tip: You can launch either the Curve Editor or the Dope Sheet by right-clicking the controller node and choosing which version of Track View to display.