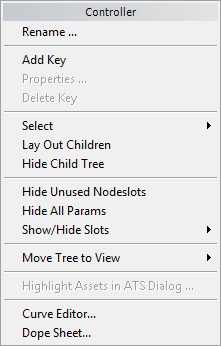
The right-click menu for controller nodes is similar to the right-click menu for material and map nodes, but it has some additional choices for creating animation.
Interface

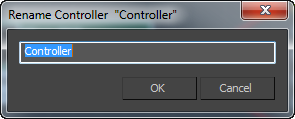
- Rename
-
Opens a dialog that lets you rename the controller.

_____
- Add Key
-
Adds a key for the controller value at the current frame. The
 (Set Key) button should be active.
 As elsewhere in the 3ds Max interface, an animated value is shown with red brackets around it.
- Properties
-
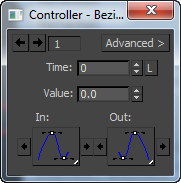
If the controller has an associated properties dialog, this choice displays that dialog. If it does not, this choice is unavailable.
This choice is also available for controllers without a properties dialog, if there is a key at the current frame. In this case, 3ds Max opens a Key Info dialog for the current key.

For information about the controls on this dialog, see Key Info (Basic) Rollout/Dialog and Key Info (Advanced) Rollout/Dialog.
Shortcut: Double-click the controller node to open the properties dialog.
- Delete Key
-
If the value has a key at the current frame, you can choose Delete Key to remove the key. If there is no key at the current frame, this choice is not available.
_____
- Select
-
- Select Children Selects children of the node you right-clicked.
- Deselect Children Deselects children of the node you right-clicked.
- Select Tree Selects all nodes that belong to the tree whose node you right-clicked.
- Select by Material (This choice appears only for material nodes.)
Select By Material allows you to select objects based on the active material in the Material Editor. Choosing this command opens the Select Objects dialog, which works like Select From Scene. All objects that have the selected material applied to them are highlighted in the list.
Note: Hidden objects don't appear in this list, even if the material is applied to them. However, in the Material/Map Browser, you can choose Browse From: Scene, turn on By Object, and then browse from the scene. This lists all objects in the scene, hidden and unhidden, along with their assigned materials. Toolbar button: Select by Material
- Lay Out Children
-
Automatically lays out the children of the currently selected node. This does not change the position of the parent node.
Keyboard shortcut: C
Menu choice: View
 Lay Out Children
  Toolbar button: Lay Out Children
 - Hide Child Tree
-
When on, the View hides children of the currently selected node. When off, child nodes are displayed. Default=off.
When child nodes are hidden, you can tell which slots have maps, because their sockets are displayed in green instead of blue.
_____
- Hide Unused Nodeslots
-
For a selected node, toggles display of the unused slots when the node is open.
Keyboard shortcut: H
Menu choice: View
 Hide Unused Nodeslots
  Toolbar button: Hide Unused Nodeslots
 - Hide/Show All Params
-
Hides or shows the parameters for the controller node.
- Show/Hide Slots
-
Displays submenus that let you choose which material or map components to display as node slots.
- Params For controller nodes, this submenu lists the parameters that the controller generates. Choose a parameter to either hide it or display it.
The Params submenu has two choices that follow the individual parameter entries:
- Show All Shows all parameters.
- Hide All Hides all parameters.
_____
- Move Tree to View
-
Moves the material tree to which the controller belongs to the named View you choose from the submenu.
If there is only one view, this option doesn’t appear on the menu.
_____
- Curve Editor
-
Opens the Curve Editor with the controller node’s output parameter displayed.
- Dope Sheet
-
Opens the Dope Sheet with the controller node’s output parameter displayed.