At each station where the scans are to take place, the user will need Trackit installed with the correct paths to the databases. ( Installing Trackit topic).
The station would have a Barcode reader and a Trackit Trigger Sheet geared for triggering each of the associated actions. If using the Item labels, the user selects the relevant mode, status change from the Trigger Sheet and then scans the Item Label to perform the change. Trackit then becomes updated with the change of item status for that item.
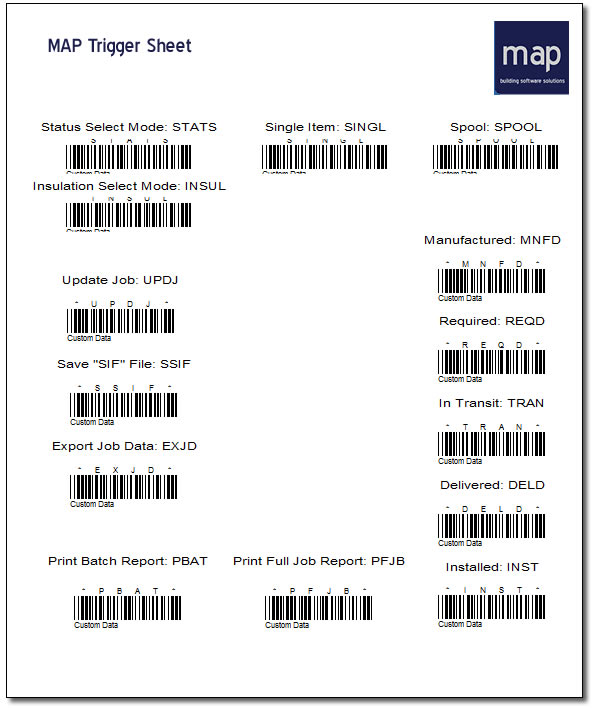
The Trigger Sheet has Barcodes for each of the trigger events setup within Trackit and would act as the menu for changing statuses, executing prints, changing between insulation and status mode etc. Important: These need to match the Triggers in Trackit.
Example shown below:
The above is done via Worksheets within the CAMduct software. File > Print Layout > Worksheets.
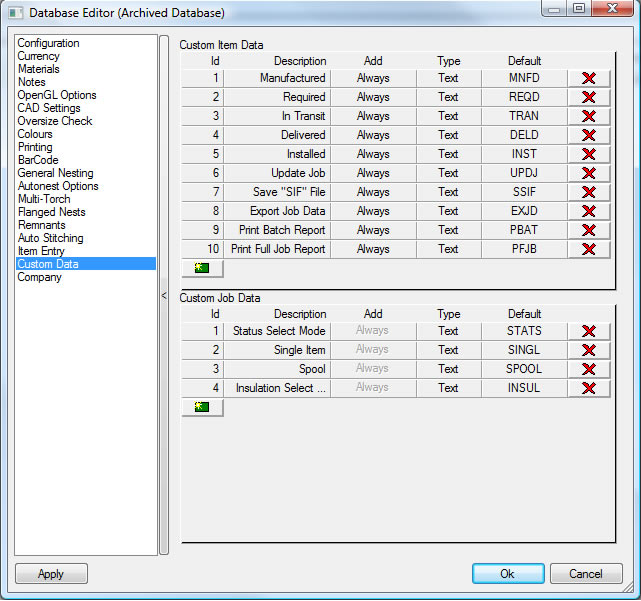
Creating Custom Fields for each of the Trigger events from Trackit allows us to assign these to an item in a new job. File > Setup > Main Database > Custom Data.
When the item is added to the Job, the custom fields become populated with the Default Custom Field values as shown below.
We can then create a Worksheets based on these custom fields and can set the output display on each of the properties to "Use Barcode" from the Font tab similar to the Label setup covered in the topic Barcode Setup.