Create a layer in Inventor Factory
Do the following to create a layer in an Inventor Factory layout.
- Click Factory tab
 Layout panel Layer Manager
  . The Layer Manager dialog box opens.
 - Click the New Layer button
 or click the character string Click here to add to create a new layer. A layer name, such as LAYER1, is automatically added to the layer list.
 - Enter a new layer name by typing over the highlighted layer name.
Set layer current
Before placing an asset, first set current the layer on which you wish it to reside. This can be done very easily using the Layer Manager drop-down list in the Layout panel.
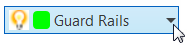
- Click the down arrow at the right of the current layer name shown in the Layout panel.
- The Layer Manager drop-down list appears containing all the layers defined in the current layout.
- Select the layer you wish to set current.
- The drop-down list closes and the layer you selected now appears as the current layer name.
A layer can also be set current using the Layer Manager dialog box.
- On the ribbon, click Factory tab Layout panel Layer Manager .
- From the layer list, select the layer you wish to set current.
- The layer name is highlighted. Click the Set Current button
 .
. - Click OK to close the Layer Manager dialog box.
Assign a color to a layer
A newly created layer is white by default. You can assign a unique color to a new layer by doing the following:
- Click the color swatch to the right of the new layer name
 , or click the word 'white'. The Color dialog box displays.
 - Select one of the basic colors, or create a custom color from the color palette at the right of the dialog box.
- Click OK to close the Color dialog box. The color you selected is assigned to the new layer.
Use this same procedure if you want to change an existing layer to a different color.
Apply layer color to assets
Select Apply Color to 3D to apply the corresponding layer color to the assets within that layer for easy identification.
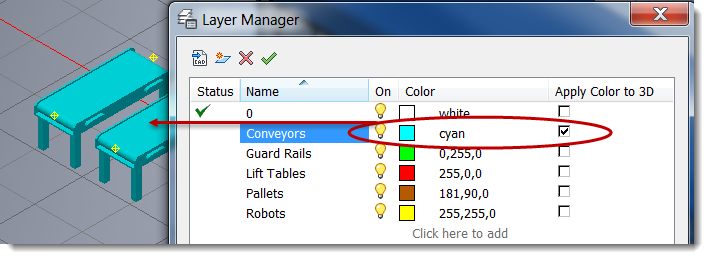
Leaving this option unchecked retains the original asset colors regardless of layer color.
Delete a layer
- Select the layer name that you wish to delete from the layer list. The layer name highlights.
- Click the Delete Layer button
 to delete the layer.
Rename a layer
- From the layer list, click the layer name you wish to rename. The layer name is highlights.
- Click the layer name a second time.
- Enter the new layer name by typing over the highlighted name.
Control the visibility of layers
By default, a newly created layer is visible. To make a layer invisible, do the following:
- From the layer list, select the layer you wish to turn off. The layer name is highlights.
- Click the Layer On icon
 . The Layer Off icon
  is enabled indicating that the selected layer is now invisible.
 - Click the Layer Off icon to restore visibility to the selected layer.
You can also quickly toggle the On/Off status of a layer by clicking the lightbulb icon in the Layer Manager drop-down list.
Import layers from an existing DWG into Inventor Factory
If the layers you require are already defined in a 2D drawing, they can be imported into your Inventor Factory layout.
- Click the Import Layers button
 to display the Import Layers dialog box.
 - Navigate to and select the DWG file that contains the layers you wish to import.
- Click the Open button to import the layers and close the Import Layers dialog box. The imported layers appear in the Layer Manager layer list and are ready for use.
How do I change the layer of an asset after it has already been placed in a layout?
There are two different methods you can use to move a placed asset from one layer to another. The first method is as follows:
- Select one or more assets from the factory floor layout. Press and hold the Ctrl or Shift key for multiple selections.
- Click the down-arrow at the right of the current layer name shown in the Layout panel.
The Layer Manager drop-down list appears containing all the layers defined in the current layout. - Select the layer to which you want to move the asset(s). The drop-down list closes and the selected assets are moved to the different layer.
The second method involves using the Factory Properties browser.
- Select one or more assets from the factory floor layout. Press and hold the Ctrl or Shift key for multiple selections. The layer name of the selected asset appears near the top of the Factory Properties browser. If multiple assets on different layers are selected, the layer name appears as *MultiValues*.
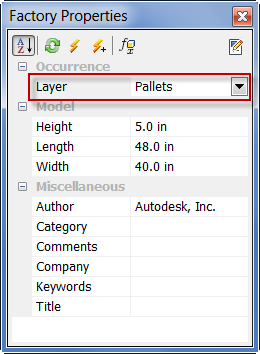
- Click the down-arrow to the right of the layer name to display a drop-down list containing the names of all the layers defined in the current layout.
- Select the layer to which you want to move the selected asset(s). The drop-down list closes and the layer you selected replaces the previous layer name.
- Click the Update button
 in the Factory Properties toolbar to move the asset(s) to the different layer.
 - Press the Esc key, or click an empty area inside the graphics window, to turn off the selection highlighting.