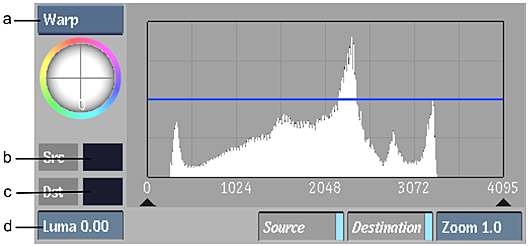
When colour correcting clips, colours that you do not want to alter may be modified in the colour correction process. Use the Warp trackball in the Basics menu to readjust a specific range of colour.
You can also adjust the luminance of the selected colour using the Luma field.
To readjust colours after a colour correction:
- Click Basics.
The Basics menu appears.

(a) Trackball option box (b) Source Colour pot (c) Destination Colour pot (d) Luma field
- Select Warp from the Trackball option box.
- Click Pick and then sample a colour in the clip you want to modify.
The colour you select is outlined in white in the 2D or 3D vectorscope. A cyan bar representing the colour appears in the 2D luma histogram. The Src Colour pot displays the colour.
- Click the Src Colour pot to set the source colour.
The Dst (destination) Colour pot is updated to match the source colour.
- Move the Warp trackball towards the destination colour.
The Dst Colour pot dynamically updates to reflect your changes. When you release the mouse, the Src Colour pot is updated to match the destination colour. In the 2D or 3D vectorscope, the selected colour moves to reflect the changes you are making to the image.
Note: To make the trackballs respond to changes in pressure, use the Pointer preferences in the Preferences menu. - To adjust the luminance of the destination colour, adjust the Luma field. When you adjust the luma of the destination colour, the entire luma content of the image is adjusted around the selection. The selected luma value changes the most.
The Dst Colour pot dynamically updates to reflect your changes. When you release the mouse, the Src Colour pot is updated to match the destination colour. In the 2D luma histogram, the cyan bar moves to reflect the changes you are making to the luma content.
- Release the trackball or click the Luma field.
The Src Colour pot is set to the Dst box colour.