Masks and mattes increase the versatility of the effects you apply on the timeline, allowing you to delimit the regions used for processing and effect, with a mask, and to create regions of total or partial transparency in the clip, with a matte.
Using Mattes in 2D Transform Timeline FX
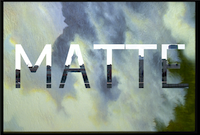 |
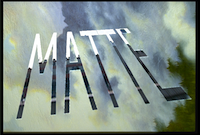 |
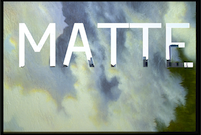 |
| In the timeline, a matte container on a track is stacked on a track with a clip of a cloud image. | The 2D Transform Timeline FX is applied, with the Matte Offset controls disabled. The front clip and matte transformations are linked. | The 2D Transform Timeline FX is applied, with the Matte Offset controls active. The matte position is offset independently of the RGB clip in the matte container. |
The matte can be offset from its original position by changing its position along the X and Y axes, or by rotating or scaling it. Edit the offset in the 2D Transform quick menu or editor. In the 2D Transform quick menu, use the 2D Transform Tab selector to display the Matte Offset menu and its controls.
Using Mattes in Blur Timeline FX
 |
 |
 |
| In the timeline, The matte container of the talent's head is stacked on a cloud image background. Image courtesy of The House |
The Blur Timeline FX is applied, and the same blur is applied to the clip and the matte (Lock to Front is enabled). | The Blur Timeline FX is applied, and a blur is applied to the matte instead of the clip (Lock to Front is disabled). |
The matte values can be blurred separately or with the same values as the front clip.
In the Blur quick menu or the editor, you can apply blur values to the matte. Click the Lock to Front button to use the same blur values that are applied to the front clip. In the Blur editor, you can also invert the matte or use the matte to apply blending in the regions defined by the matte.
Using Masks in Colour Correct and Colour Warper Timeline FX
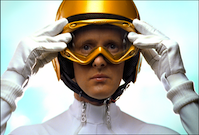 |
 |
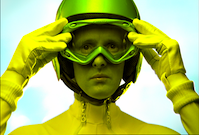 |
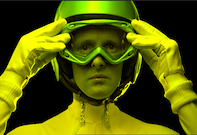
| The RGB clip will be added to a matte container with a matte surrounding the talent. Image courtesy of Das Werk |
A Colour Warper Timeline FX is applied to the matte container. By default, it creates a transparency. | When the matte clip is used as a mask, it defines where to apply the Colour Warper Timeline FX on the RGB clip. |
You can change the default functionality of the matte clip and instead use it as a mask to isolate the area in which you want to add colour effects and corrections.
In the Colour Corrector or Colour Warper quick menu, enable the Use Mask button, which uses the matte to delimit the region that will be processed with the colour effects.
Using Mattes in Comp Timeline FX
 |
 |
|
| In a matte container containing a logo, The Comp Timeline FX is active by default. An image of a gladiator was stacked on a track underneath, so it is composited in the result. Image courtesy of Buzz Image Group, Inc. |
When the Comp Timeline FX is disabled or the matte is turned off, only the RGB clip is displayed. |
All mattes used in the Timeline FX pipeline for the segment are composited using this effect. The composited mattes for each segment can be turned on or off, or be inverted.
A clip can be in a premultiplied or unpremultiplied state. An unpremultiplied clip has its pixels divided by the pixels in the matte. A premultiplied clip has its pixels multiplied by the pixels in the matte. Use the Comp Timeline FX quick menu or the editor to set the Segment and Background Premultiplication boxes to the appropriate states.
By default, a segment on a track is blended with the background, and the matte is turned on by default. In the Comp quick menu and editor, use the Matte box to also turn the matte off or invert it.
Using the GMask Timeline FX
On an RGB clip, using GMask Timeline FX will apply the matte to create a garbage mask that defines which areas of the image appear in the result clip. With a matte container, the matte clip and the GMask matte are composited in the result matte.
Use the GMask quick menu to select a shape from a library of presets, or enter the editor to create your own.
Using Masks in Text Timeline FX
 |
 |
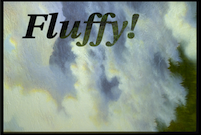 |
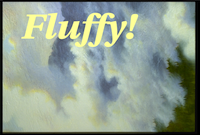
| In RGB rendering mode, the Text Timeline FX is overlaid on the clip. | In RGBA rendering mode, only the text appears on the clip and the image is masked out. In this example, a cloud image was stacked on a track underneath, so it appears as a background. | In A Only rendering mode, the text appears with the RGB clip used as a fill. In this example, a cloud image was stacked on a track underneath, so it appears as a background. |
There are three states in which you can manage text in Timeline FX, (two of which allow masking functionality).
In the Text Timeline FX quick menu, use the Alpha Rendering Mode box to select a state:
- RGB: If you are using an RGB clip (or matte container), to generate a clip (or RGB portion of the clip) with the text overlaid.
- RGBA: If you are using an RGBA clip/matte container, to generate a text overlay and use the text outline as a mask to display it on background tracks.
- A Only: To generate a source based on the text as a mask and segment as a fill. For best results, use unpremultiplied input. In the segment's Comp Timeline FX, verify that the Segment Premultiplication box is set to Unpremultiplied.