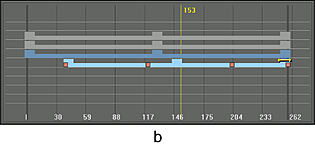
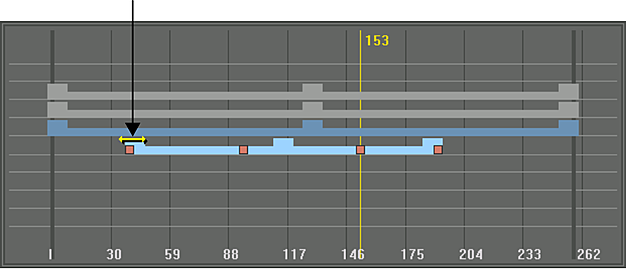
Using the Track Editor, you can independently modify the animation's start or end point. This changes the animation's overall duration and scales the keyframes. Dragging the start or end point compresses or stretches the keyframes in the selected channels. If you want to simply move the first or last keyframe to another point in time, drag the keyframe.
 |
 |
|
(a) Before scaling keyframes (b) After scaling keyframes |
|
To adjust an animated channel's start or end point:
- Display the Track Editor.
- In the Channel hierarchy, select the channel you want to modify.
The corresponding track in the Track Editor turns light blue and its keyframes appear.
- In the Tools box, select Move.
- Select the first or last keyframe and drag it to change the start or end point of the animation. Note: Adjusting the timing for a folder changes the timing for all channels in that folder.
To scale an animated channel's timing:
- Display the Track Editor.
- In the Channel hierarchy, select the channel you want to modify.
The corresponding track in the Track Editor turns light blue and its keyframes appear.
- In the Tools box, select Move.
- Move the mouse over the starting light-blue handle. When a two-directional arrow cursor appears, drag to the left or right to slide the start point forward or backward in time.

As you drag the handle, the keyframes in the track scale proportionally to the amount you move the handle.
Note: Adjusting the timing for a folder changes the timing for all channels in that folder.