Create a connection override to override any attribute connection; for example, a connection on your surface shader.

The following guidelines and example describe how to create a connection override to override any attribute connection on your surface shader. Although shaders are used as an example in this case, you can follow the same guidelines to override any attribute connection. Instead of adding your shader to the collection, add the node for which you want to override to your collection.
Create a connection override to override any attribute connection on your surface shader
- Create a collection and add to it your object(s).
- Create a second collection and add to it your shader(s).
- Right-click the shaders collection and select Create Connection Override.
- Middle-mouse drag and drop the attribute you want to override (for example, Transparency) from the shader Attribute Editor to the Property Editor.
-
Click the map button
 beside the attribute in the
Property Editor to connect to a new render node.
To connect to an existing render node, middle-mouse drag and drop from the Hypershade Browser panel to the Override attribute.
 ; click this to refresh your layer and see the updated result.
Example
Create a connection override to override the texture assigned to the Transparency attribute of the shaders assigned to the lamp_body and lamp_brassFixture.
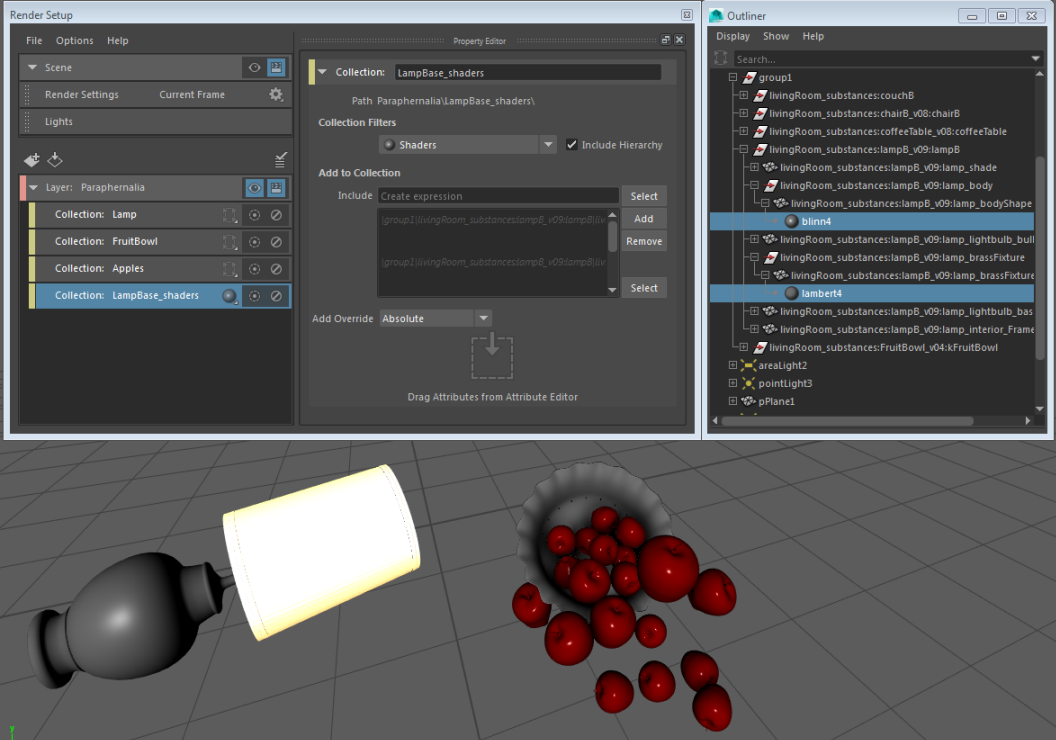
- Right-click the layer and select Create Collection to create a collection LampBase_shaders.
- Select the lamp_body and brass_Fixture nodes in the Outliner and click Add in the Property Editor to add them to the collection.
- Ensure that Include Hierarchy is enabled in the collection Property Editor so that the collection would traverse the lamp_body and brass_Fixture parent nodes to include their child nodes.
- Select
Shaders from the
Collection Filters drop-down list to ensure that only the shaders assigned to lamp_body and brass_Fixture are included in the collection.
Click Select to the verify your collection members.
Note: Alternatively, you can populate your LampBase_shaders collection by selecting the blinn4 and lambert4 shaders in the Outliner and clicking Add in the Property Editor.
- Right-click the LampBase_shaders collection and select
Create Connection Override.
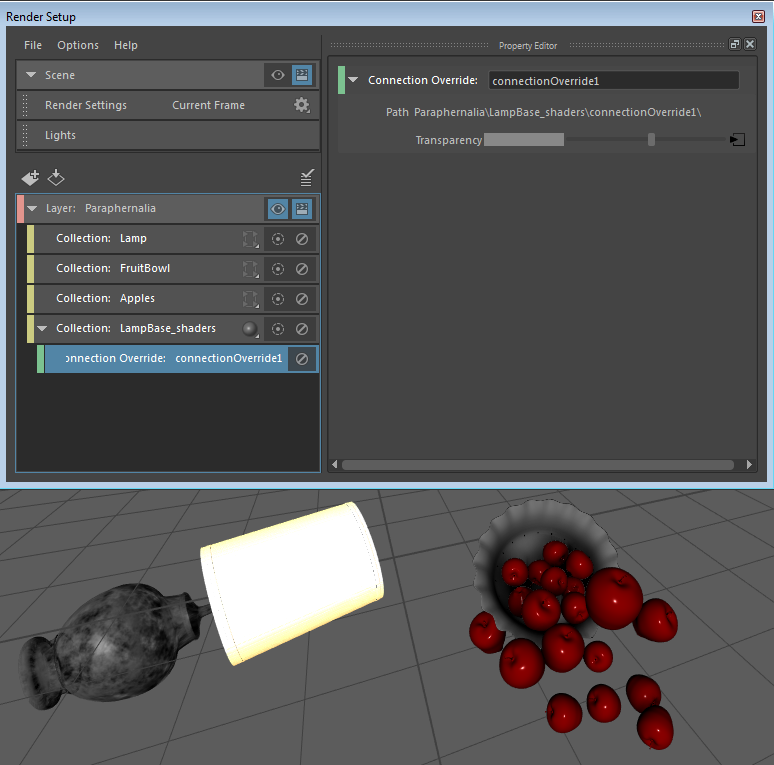
Drag and drop the Transparency attribute of any Maya shader from the Attribute Editor to the Property Editor, and map the override to a any texture, for example, Fractal. The result is as follows.

You can apply a connection override to more than one shader simultaneously. The override node searches for the specified attribute in all of the shaders in the collection. In this case, because both blinn and lambert have a Transparency attribute, the override is applied to the transparency of both shaders.
Connection overrides are applied to all shaders in the collection; for example, in this case: blinn4 and lambert4 in the LampBase_shaders collection. If the fruit bowl also had been assigned either the blinn4 or lambert4 shader, it would have the transparency override applied, even though the original intention may have been to override only the transparency of the lamp base. It is therefore worthwhile to verify the shaders applied to the each object in your layer to avoid inadvertently overriding the shader of an object. To do this, select Display > Assigned Materials in the Outliner.