Override the color attribute of the shaders applied to the objects in your collection.

To create a color override, you must add the shader nodes that you want to override to the collection.
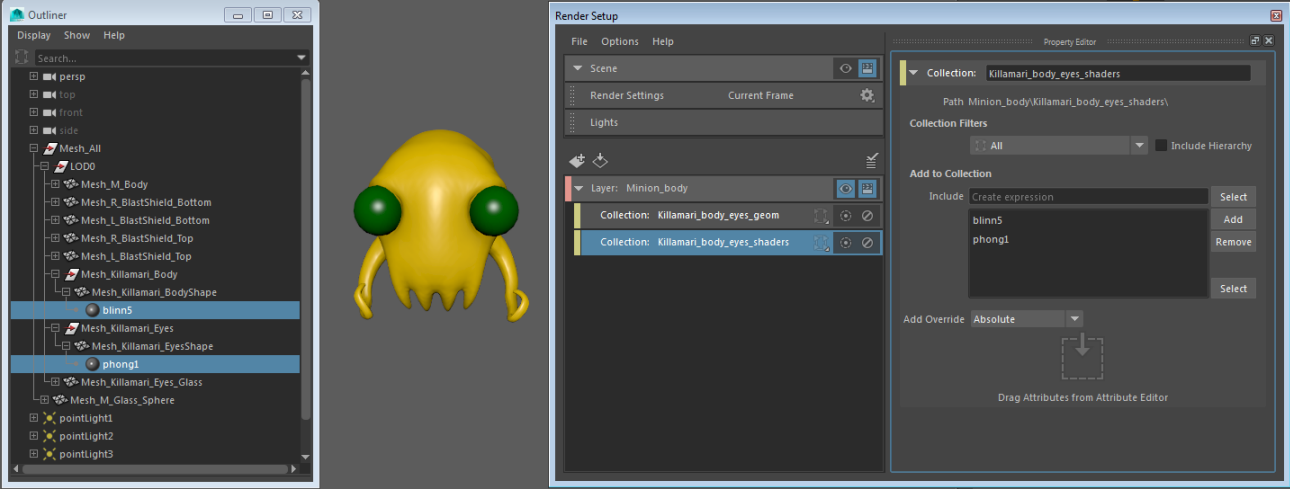
To begin this example, Mesh_Killamari_Body has a blinn5 (orange color) applied, and Mesh_Killamari_Eyes has a phong1 (green color) applied. A render layer Minion_body has been created, with a collection named Killamari_body_eyes_geom and a collection named Killamari_body_eyes_shaders.
To override the color of the squid's body and eyes
- Select the Killamari_body_eyes_geom collection and middle-mouse drag and drop Mesh_Killamari_Body and Mesh_Killamari_Eyes to the Property Editor.
- Select the Killamari_body_eyes_shaders collection and add blinn5 and phong1 to the
Property Editor.
Note:
In the Outliner, select Display > Assigned Materials to display shaders assigned to each object in the scene. Select blinn5 and phong1, and click Add in the Property Editor to add the shaders to the static selection list.
See also Add collection members by node type for an alternate way to add shaders to your collection.

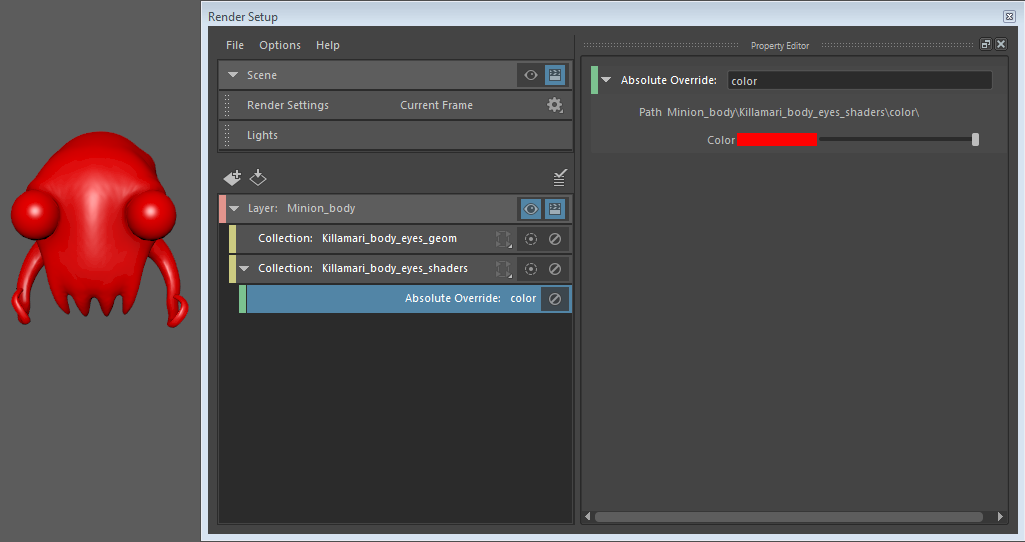
- In the Render Setup window, select the Killamari_body_eyes_shaders collection, and select Absolute from the Add Override drop-down list in the Property Editor.
-
Middle-mouse drag and drop the Color attribute from the shader (for example, phong1) Attribute Editor to the Property Editor.
You can drag the Color attribute from any shader. You are only dragging the Color attribute, not the attribute of the phong1 shader in particular.
Select the color override and set your new color values using the color swatch.
Note:The color override will be applied to all objects (and instances of objects) that are in the same layer and that have either the blinn5 and phong1 shader assigned initially.
