Click on the Constraints button under the Setup panel on the ribbon or right-click on Constraints at the top of the tree and select New to open the window below.

The form has the following main sections:
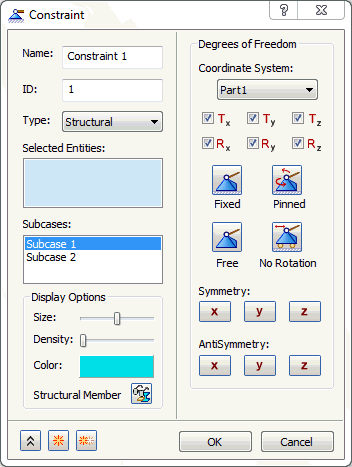
- Name: Enter type of constraint for this field. For example, Back Face Fixed.
- ID: The ID of a constraint is automatically updated sequentially as new constraints are created so that it is unique to each of the constraints.
- Type: Select the type of constraint to apply to the model.
- Structural
- Thermal
- Selected Entities: This section lists the various entities that can be selected to constraint. A face, edge or vertex can be selected.
- Subcases: Allows you to select the subcases you want to apply the constraint to.
- Display Options: Allows you to edit the display options of the constraint.
- Degrees of Freedom: Allows you to select the degrees of freedom of the nodes associated with the selected entities that are to be constrained.
Click the links at the bottom of the page to see more info on some of these topics.