When performing energy analysis using conceptual masses, use these guidelines.
Keep it simple
Start with a simple model to study massing and orientation on the project site.
Use conceptual energy analysis during the early design phase to ensure that energy use and natural resources are considered during the design selection process. Greater geometric complexity does not necessarily result in greater accuracy during analysis.
Model only major spaces, and combine smaller spaces that represent key requirements of the project. You do not need to define minor spaces like rest rooms, closets, or stairwells. By partitioning the space into more parts than necessary, you may introduce errors and slow the simulation without significantly improving the accuracy of the results.
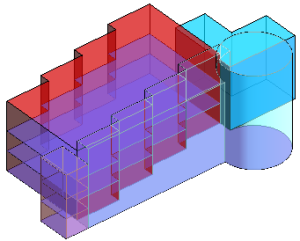
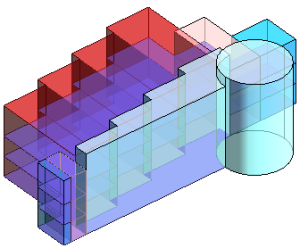
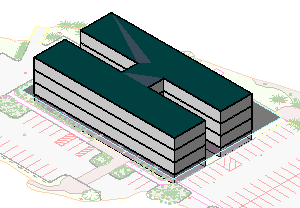
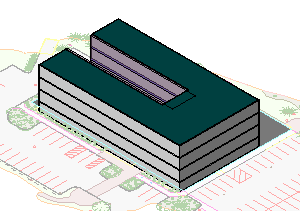
| Use a simple mass with large forms to represent major parts of the design. | A complex mass consisting of many small forms may result in errors and will not necessarily produce a more accurate simulation. |
 |
 |
Analyze 3D views
Perform energy analysis using a 3D view in the drawing area.
Revit simulates only the masses that display in the 3D view. When the simulation is complete, the Energy Analysis Result section of the Results and Compare dialog shows the mass that was simulated.

Align surfaces
During simulation, the type of surface affects automatic modeling (such as the presence of glazing and skylighting) and impacts simulation results, including heat loss or gain. Misaligned surfaces can lead to simulation errors, such as interior wall surfaces analyzed as exterior wall surfaces or floor surfaces analyzed as roofs.
To avoid these simulation errors, model masses accurately so that coincident surfaces align properly.
Simplify a complex model
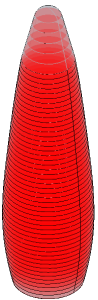
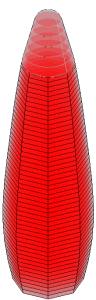
Simulation may fail on models with curved surfaces or complex shapes because these surfaces are faceted by the system. Automatic zoning (defined using a core offset and divided perimeters) further increases the complexity of the model.
If simulation fails, modify the model by simplifying or removing curves.
| Curved surfaces or complex shapes may cause the simulation to fail. | Change curves into facets for a successful simulation. |
 |
 |
In a complex model, replace the use of automatic zones with custom zones to simplify the core.
During conceptual energy analysis, Revit can simulate the following maximum numbers of surfaces and spaces:
- Spaces/rooms: 9999
- Exterior walls: 64,000
- Interior walls: 64,000
- Windows: 64,000
- Doors: 4096
- Shades: 10,000
Experiment
Try using different simple forms to determine which changes have the largest impact on energy consumption or allow the most energy generation potential. Certain building parameters influence energy consumption more (or less) than you might expect due to the building type and location.
For example, experiment by running an analysis on a model that uses a large amount of high performing glass. Then run a second analysis on a model that uses low performing glass. Compare the results to see whether modifying the glass has a significant impact on energy consumption for the building type and location.
The energy consumption of buildings with high occupancy rates or equipment densities (such as assembly buildings, data centers, convention centers, and theatres) often depends on assumed hours of operation and intensity of operation. For these building types, it is important to determine the simulation parameters that are the primary drivers of energy consumption. Study and optimize orientation, glazing type and quantity, and shell construction.
Remember that the Use Conceptual Masses mode for the Run Energy Simulation tool is designed to provide energy analysis on conceptual models. It is not intended to provide results that are equivalent to energy analysis on detailed designs.
Consider using design options
Use design options to explore alternative forms quickly and easily. Then analyze each option and compare the results. The Run Energy Simulation tool analyzes the design option that is currently visible in the 3D view.
| Explore alternative forms using design options. | |
 |
 |
Review surface assignments
You can assign different constructions or parameters to individual mass floors, walls, windows, roofs, and skylights in the model..
Parameters defined for individual faces override the project-wide settings defined in the Energy Settings dialog and the Advanced Energy Settings dialog.
For example, to reduce the amount of glazing on the south face of the building:
- Click Massing & Site tab
 Conceptual Mass panelShow Mass Surface Types.
- In the drawing area, place the cursor at the edge of the Mass Exterior Wall surface to modify, press Tab until the surface is highlighted (watch the status bar), and click the surface to select it.
- On the Properties palette, under Energy Model, for Values, select <By Surface>.
- For Target Percentage Glazing, specify a lower percentage to reduce the glazing, or enter 0 (zero) to eliminate it.
Review space assignments for zones
If you do not want to use project-wide defaults for all zones, assign specific zone/space details to individual zones in the mass model, as follows:
- Click Massing & Site tabConceptual Mass panelShow Mass Zones and Shades.
- Select a zone.
- On the Properties palette, in the Energy Analysis section, for Space Type, select the desired type.