Create the board as a thin solid box.
Procedure
- Position the cursor over the Board:1 heading in the browser. A circle (radio button) appears at the right side of the heading. Click this Activate Component radio button to make the board the currently active component. Geometry created in the next few steps will be added to this part.
- Click
 CREATE
 Box. The origin temporarily becomes visible so that you can select a drawing plane for the box.
 - Select the XY plane (by clicking the plane representation bounded by the red and green axes).
- Click the symbol at the coordinate origin to begin the solid box. The cursor crosshairs will snap to the origin when near to it.

- Move the mouse to the right to start a rectangle in the +X, +Y quadrant. Tip: From the mini-axis that is displayed beneath the ViewCube, you can see that the X direction (as currently viewed) is down and towards the right. The Y direction is up and towards the right.
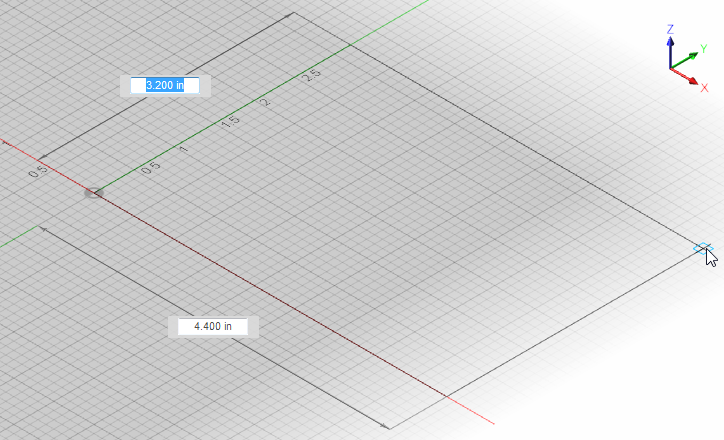
- Depending on the direction you first drag the cursor, either the X or Y dimension can be initially highlighted. Enter the two dimensions listed below in the order that matches whichever input field is highlighted first. In the preceding image, the Y dimension input field is highlighted. The board length and width dimensions are as follows:
X dimension = 11
Y dimension = 7
- Type the appropriate first dimension (X or Y value) and press Tab or Enter to lock the input field and to advance to the second dimension. Note that a padlock glyph appears next to a dimension when it is locked-in. Tip: You do not need to click in the dimension text fields. Just type a dimension and the currently highlighted field will be overwritten with the keyboard input. Be careful not to move the mouse before pressing Tab or Enter to lock in the correct dimension. A significant mouse movement will unlock and change the dimensions.
- Type the appropriate second dimension, and press Enter to lock this input field.
- Type the appropriate first dimension (X or Y value) and press Tab or Enter to lock the input field and to advance to the second dimension. Note that a padlock glyph appears next to a dimension when it is locked-in.
- Press Enter one more time to accept the base rectangle and begin the Z extrusion process. A BOX dialog box appears.
- Type 0.1 in the Height field.
- Press Enter (or click OK) to complete the creation of the solid box.
- In the Navigation Bar along the bottom edge of the screen, click
 Zoom (Fit All) to enclose the model within the display canvas. You might need to zoom or pan further, if the model extends beyond the bottom of the command ribbon.
 The board should look like the following image:
