After you selected your respective machine, it is added to the project tree. To add parts to it you can simply drag them down from the parts tab and they will be available on the workspaces' platform. You can also add machines to your favorites, so they also appear on top of the machine library. To do that perform a right click on them in the library and add them to your favorites. The second option here is to load the workspace on startup of Netfabb.

Drag your parts down into the workspace to add them to the machines’ platform.
After your part has been added to the workspace you get different interaction options. There are 3 different tabs: Parts, Visualization and Simulation and a couple of quick access buttons at the bottom of the context area. The functionality of these buttons is described as follows:
Automatic placement: Automatically arranges parts on the platform.
Collision detection: Checks the build space for any touching parts and visualizes collisions, according to set tolerances.
Generate preview: Takes you to the Visualization tab. For a detailed description please find it below in this chapter.
Export build data: Exports your part with supports and the set build configuration, to take it directly to the machine.
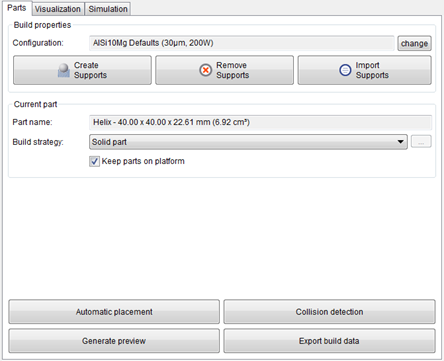
The context area changes to this specific workspace configuration, with quick access buttons on the bottom and the different tabs at the top.
As described above the second element of the workspace context area, are the 3 tabs at the top: