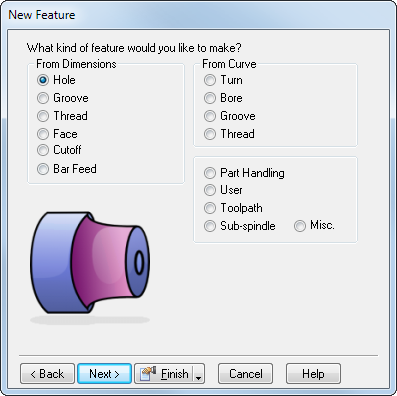
To create a Bore feature:
- Create the curve that defines the shape of the feature.
- Click the Features
 step in the Steps panel.
The New Feature wizard is displayed.

- In the From Curve section, select Bore, then click Next to open the New Feature - Curve page.
- Click Next to open the New Feature - Location page
- Click Next to open the New Feature - Strategies page. A bore feature automatically creates a roughing, and a finishing operation. If you want to create fewer operations, select the appropriate operations. The other attributes on this page are the same as those on the Strategy tab of the Feature Properties dialog.
- Click Next to open the New Feature - Operations page.
- Click Next to open the New Feature - Default Tool page for the first operation.
- Click Next to open the New Feature - Feed/Speed page for the first operation.
- Click Next to open the New Feature - Tool Usage page for the first operation.
- If you have more than one operation, clicking Next opens the New Feature - Default Tool page for the next operation. If you have no more operations, clicking Next opens the New Feature - Summary page.
- Click Finish to create the feature and exit the wizard or click Back to return to previous pages.
Note: You can edit the feature later.
If you are working from a casting, you can include a stock curve to limit the extent of the roughing pass. To set a stock curve:
- After you have created the feature, open the Feature Properties dialog and click the Dimensions tab.
- Click the Stock Curve button and select the curve from the Curve list.
- Click OK.