[テクスチャをレンダリング](またはテクスチャ ベイク処理とも言う) は、プロダクション レンダラーを使用して 3ds Max ジオメトリ シーン オブジェクトのサーフェスのさまざまな側面をキャプチャし、ビットマップを作成する処理です。既定値のスキャンライン レンダラーはこの機能をサポートします。
[メイン メニュー](Main Menu) > [レンダリング](Render) > [テクスチャをレンダリング](Render To Texture)メニュー項目に用意されている 3ds Max の[テクスチャをレンダリング](Render To Texture)ツールは、実際にはスクリプト ツールとして実装されています。
..¥ui¥macroscripts¥Macro_BakeTextures.mcr
また、このツールのネットワーク バージョンで使用される[テクスチャをレンダリング](Render To Texture)メソッドの一部は、次のファイルに含まれています。
..¥stdplugs¥stdscripts¥RTT_methods.ms
[テクスチャをレンダリング](Render To Texture)のコンポーネント
ここでは、テクスチャへのレンダリング処理に使用される MAXScript のクラス、インタフェース、プロパティ、メソッドに関する簡単な概要と、これらを使用して独自のテクスチャ ベーキング ツールを作成する方法を紹介します。
要素のベイク処理
テクスチャ ベイク処理に関連するメイン オブジェクト クラスは、Bake Element です。
このオブジェクト クラスは、拡散反射光、ライト, アンビエント オクルージョン、法線、シャドウなどのプロダクション レンダラーから特定のチャネルをキャプチャする機能を持ったオブジェクトとして実装されます。
INodeBakeProperties インタフェース
サーフェスをベイク処理されるジオメトリ オブジェクトについては、すべてのシーン ノードによって公開される INodeBakeProperties インタフェースを使用して処理用のセットアップを行う必要があります。
このインタフェースは、特定のノードに 1 つまたは複数のベイク処理要素を追加し、ベイク処理を可能にしてその他の関連パラメータをコントロールする目的で使用されます。
プロダクション レンダラー
プロダクション レンダラー(既定値のスキャンライン レンダラーを含む)は、次のようにして起動した特別なモードの MAXScript を使用して呼び出す必要があります。
render rendertype:#bakeSelected
UVW アンラップ
ベイク処理したテクスチャを使用するためには、レンダリングするオブジェクトがオーバーラップのない、良好なテクスチャ座標を持っている必要があります。
3ds Max に付属の[テクスチャをレンダリング]スクリプトでは、Unwrap_UVW モディファイヤの自動適用とセットアップをコントロールすることによって、テクスチャ座標をベイク処理に使用できるようにしています。正しく使用できる適切な UV 座標がオブジェクトに用意されている場合を除き、独自のスクリプトを作成する場合でも、同様にする必要があります。
投影マッピング
法線マップを生成する場合などは特に、レンダリングされるサーフェスがオブジェクトの高解像度バージョンであり、マッピングされるターゲット オブジェクトは低解像度バージョンである場合があります。このような場合は、解像度が低いオブジェクトのテクスチャ座標を、解像度が高い方のオブジェクトからの投影によって生成する必要があります。
「インタフェース: INodeBakeProjProperties」、「投影モディファイヤ」、「Project_Mapping : ReferenceTarget」が、3ds Max 投影マッピング システムの主な要素です。
シェル マテリアル
シェル マテリアルは、[テクスチャをレンダリング]ツールと組み合わせて使用するために特別に設計されたものです。2 種類のマテリアル、通常は元のマテリアルとベイク処理済みマテリアルを保持することができます。いずれも、ビューポートまたはレンダラーで使用することができます。
簡単な[テクスチャをレンダリング]スクリプトの開発
次の例は、[テクスチャをレンダリング]カスタム スクリプトを作成するための基本的な手順を示したものです。
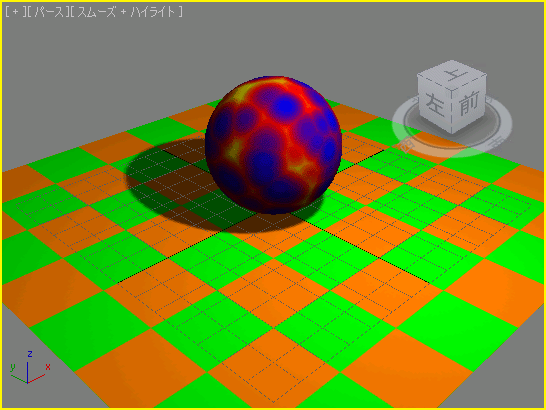
このスクリプトでは、テクスチャが適用された平面上にテクスチャが適用された球があり、影付けが有効なオムニ ライトで照明されているという、単純なシーンを作成しています。
次に、両オブジェクトの拡散反射光およびライトの要素をディスク上の TGA ファイルにベイク処理し、1 つのスロットに古いマテリアルが、他方のスロットにはベイク処理済みマテリアルが含まれているシェル マテリアルを作成します。
ベイク処理されたマテリアルでは、拡散反射光およびライト情報を単一の拡散反射光マップに統合するために合成マップを使用しています。
この単純な例では、両オブジェクトのテクスチャ座標はジオメトリ プリミティブによって手続き的に生成され、ベイク処理に使用することができます。また、この例では投影マッピングは必要ありません。
|
スクリプト: |
fn BakeDiffuseAndLighting obj size = ( --Clear all render elements obj.iNodeBakeProperties.removeAllBakeElements() --Preparing the Bake Elements: be1 = diffusemap() --instance of the bake element class be1.outputSzX = be1.outputSzY = size --set the size of the baked map --specifythe full file path, name and type: be1.fileType = (getDir #image+"\\"+obj.name+"_diffuse.tga") be1.fileName = filenameFromPath be1.fileType be1.filterOn = true --enable filtering be1.shadowsOn = false --disable shadows be1.lightingOn = false --disable lighting be1.enabled = true --enable baking be2 = LightingMap() -- instance of the bake element class be2.outputSzX =be2.outputSzY = size --set the size of the baked map --specifythe full file path, name and type: be2.fileType = (getDir #image+"\\"+obj.name+"_lighting.tga") be2.fileName = filenameFromPath be2.fileType be2.filterOn = true --enable filtering be2.shadowsOn =true --enable shadows be2.enabled = true --enable baking --Preparing theobjectfor baking: obj.INodeBakeProperties.addBakeElement be1 --add first element obj.INodeBakeProperties.addBakeElement be2 --add second element obj.INodeBakeProperties.bakeEnabled = true --enabling baking obj.INodeBakeProperties.bakeChannel = 1 --channel to bake obj.INodeBakeProperties.nDilations = 1 --expand the texturea bit select obj --we are baking the selection, so we select the object --Call the renderer to bake both elements: render rendertype:#bakeSelected vfb:off progressBar:true outputSize:[size,size] theComp = CompositeTextureMap() --create a composite map theComp.add() --add a second layer theComp.blendMode = #(0,5) --set second layer to Multiply --Create two maps, one with the diffuse, one with the lighting map theMap1 =bitmaptexture filename:be1.fileType theMap2=bitmaptexture filename:be2.fileType theComp.mapList = #(theMap1,theMap2) --composite the two maps theComp.opacity = #(100,70) --set the lighting map to 70% opacity --Create a standard self-illum material using the Composite map bakedMat = standard diffusemap:theComp selfIllumAmount:100 --Assign a Shell Material to the object, --keep the old material as original material, --set the new bakedMat as the baked material: obj.material = Shell_Material originalMaterial:obj.material\ bakedMaterial:bakedMat viewportMtlIndex:1 renderMtlIndex:1 --Show the textures of the baked material in the viewport showTextureMap obj.material obj.material.bakedMaterial true )--end fn resetMaxFile #noprompt--reset the scene to start from scratch --Create a shadow casting white Omni light theLight = omniLight pos:[0,-60,100] rgb:white theLight.baseobject.castshadows = true --Create a mapped sphere object above the ground plane theObject = Sphere segs:32 mapcoords:true pos:[0,0,25] --Create a Cellular map and assign via Standard material to object theMap = cellular cellColor:blue divColor1:red divColor2:yellow size:15 theObject.material = standard diffusemap:theMap --Call the Bake function with the object and the desired size BakeDiffuseAndLighting theObject 256 --Create a mappedplaneobjecton theground plane theObject = Plane width:200 length:200 mapcoords:true --Create a checker map and set the tiling to 4x4, then assign to object theMap = checker Color1:green Color2:orange theMap.coordinates.uTiling = theMap.coordinates.vTiling = 4 theObject.material = standard diffusemap:theMap --Call the Bake function with the object and the desired size BakeDiffuseAndLighting theObject 256 --Delete the light from the scene and deselect everything delete theLight max select none |
|
結果 |
|
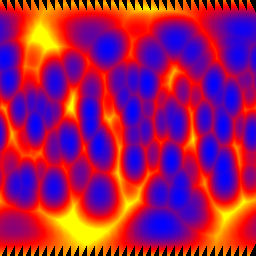
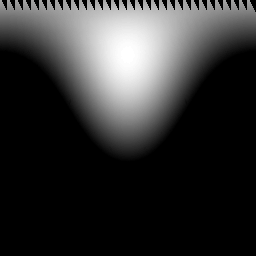
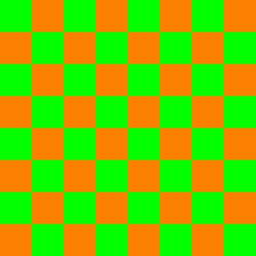
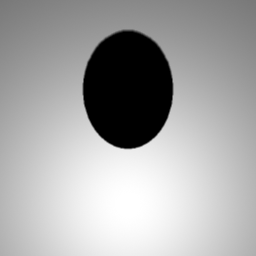
スクリプトを実行すると、イメージ フォルダに次の 4 つのベイク処理済みテクスチャが書き込まれ、これがビューポート内のシーン オブジェクト上に表示されます。 |
|
 |
