Layers are like transparent overlays on which you organize and group different kinds of scene information. The objects you create have common properties including color, renderability, and display. Layers have these properties as well, and the objects they contain can inherit the properties from their layer.
To manage scene layers, use any
Scene Explorer in Sort By Layer mode or open Layer Explorer with the
![]() (Toggle Layer Explorer) button on the main toolbar. Both versions work the same; the difference is that switching an active Scene Explorer to Sort By Layer mode retains the previous layout (columns and toolbars), while Layer Explorer offers a preset layout designed for working with layers.
(Toggle Layer Explorer) button on the main toolbar. Both versions work the same; the difference is that switching an active Scene Explorer to Sort By Layer mode retains the previous layout (columns and toolbars), while Layer Explorer offers a preset layout designed for working with layers.
Using layers makes it easier to manage the information in your scenes. You typically use layers to control the visibility of objects in your scene; they also control the frozen state of member objects, and can control wireframe color, render, display, and motion-blur properties.
For example, say you're working on a scene that depicts a floor in an office building. You could create a different layer for each room on the floor and then assign all objects in the room to their room's layer, or you could instead organize the layers to contain different categories of objects throughout the floor, such as furniture, fixtures, people, and so on. In either case, you can toggle the visibility of each layer so you're working only on aspects of the scene of immediate interest, quickly hiding the rest so they don't interfere with your work. Or, if you want to see the locations of objects on a particular layer, but don't care what they look like, you can set the objects' display properties to By Layer. Then, toggling the layer's Display As Box setting switches the display of all of its objects between bounding boxes and geometry. You can also assign a different color to each layer to make it easy to identify its contents.
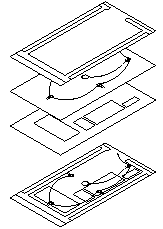
Layers can help organize the contents of a scene.
Layer-Object Relationships
Layer Explorer is a Scene Explorer mode that displays layers and their associated objects. This makes it easy to organize and make changes to objects in a scene. This dialog lets you adjust property settings both at the layer level and individually for each object. By right-clicking a selected object in the list and choosing By Layer from the quad menu, you cause the object to inherit all settings from the layer it is associated with. Or you can specify which categories of settings it inherits with the By Object / By Layer toggles on the Object Properties and Object Color dialogs.
Special Layer 0
When you begin a new scene, 3ds Max creates a special layer named 0 (default). By default, objects on layer 0 are visible and renderable. You can’t delete or rename layer 0.
If you haven’t created any layers, 3ds Max places objects you create on layer 0 by default. If other layers exist, new objects are added to the active layer. After you create objects, you can reassign them to different layers.
Display Properties
You can use the Layer Properties dialog to specify layer visibility individually for each viewport. If you don’t want to display a certain layer, you can hide that layer. 3ds Max hides the layer both in the viewport and, by default, in rendered output from the scene.
 Common Parameters rollout.
You can specify that a layer displays its member objects as shaded, wireframe, bounding boxes, or using the active choice on the Shading Viewport label menu. This way you can display different objects differently in the same scene.
You can display layers in See-Through mode. See-Through mode temporarily displays selected objects in translucent form so you can see through them without applying special materials. You can toggle See-Through mode for all objects per layer.
You can also freeze and hide layers using the corresponding commands in the Display quadrant of the quad menu.
Nesting Layers
A layer can contain any combination of objects and other layers. Layers can be nested to the limits of your system, which makes it convenient to create layer hierarchies that are meaningful for your scene. For example, in an inventory system, the top layer could represent a room or warehouse, then the next level of layers could be shelving units, then boxes on shelves, then the contents of the boxes and so on. However, bear in mind that each object inherit its display properties, rendering control properties, and so on, only from the layer it belongs to, not from any parent layers.
Layer Names
You can create and name a layer for each conceptual grouping (such as walls or terrain) and assign common properties to those layers. By grouping objects into layers, you can control their display and make changes quickly and efficiently. Layer names can be of any length up to 255 characters, and can contain letters, digits, blank spaces, and the special characters dollar sign ($), hyphen (-), and underscore (_).