To create an accurate model of your layout, you often need to draw relative to a particular UCS plane or relative to other objects in your building model. As you draw, you can use the Compass to guide the direction of your run. Any part you add to a layout can be aligned to a specified rotation angle or snap increment angle on the Compass. You can use tick marks on the Compass as a visual reference to guide the alignment of the insertion point and angle of a part. Using snap increments and tick marks provides a fast and consistent method of laying out runs.
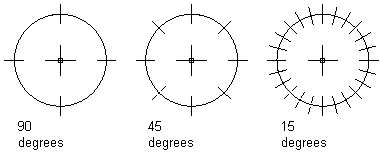
Examples of Compass tick mark increment settings
For most drafting tasks, it is useful to assign tick marks based on the specified snap increment. For example, if the snap increment is at 45 degrees, then assign tick marks to appear at 45 or 90 degrees. However, if the snap increment is less than 45 degrees, such as 15 degrees, assign the tick marks to appear at 30, 45, or 90 degrees to avoid a cluttered Compass display.
You can also change the color and size of the Compass display to enhance the visibility of the Compass as it overlaps and aligns with objects in your drawing. The Compass size is expressed in pixels and remains constant regardless of the zoom scale factor you apply to a drawing.
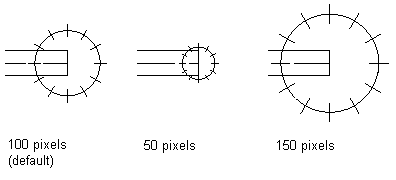
Compass diameter changes
When the Compass is enabled, you can switch the UCS plane you are drafting by using the Plane option. Each time you switch planes the UCS axis changes:
- The X axis switches to the Y axis.
- The Y axis switches to the Z axis.
- The Z axis switches to the X axis.