In this exercise you use Mask to exclude areas of an image from view without deleting the raster data.
You create a mask to display a subset of the images in a drawing. A mask shows the area of the image inside the mask boundary and hides areas of the image outside the mask boundary.
If the drawing contains more than one image, AutoCAD Raster Design toolset has settings to control what happens with images that are completely outside the mask boundary. Options for these images are to hide, unload, or leave them unaffected. Unlike cropping and rubbing, masking does not permanently modify images. Also, you can have multiple masks defined in a drawing and can selectively turn them on and off to redisplay the images.
In this exercise, you create a mask to hide the title block in the image of a floor plan of a school building. This raster title block contains old information and cannot be updated readily. Using Mask, you can hide the old title block, retaining the data for historical purposes. You can then insert a new vector title block, annotate it for the revised floor plan, and plot the drawing.
Related Exercises
Before doing this exercise, ensure that AutoCAD Raster Design toolset options are set as described in the exercise Exercise A1: Setting AutoCAD Raster Design Toolset Options.
Exercise
- In the \Tutorial4 folder, open the drawing file
Hybrid_05.dwg.
Select the image mask options
- Click
Raster menu
 MaskCreate.
- In the
New Image Mask dialog box, specify the following settings:
- Select Enable Mask.
- Under Image(s) Outside the Image Mask, select Hide Image(s).
- Clear Show Image Frame(s).
Define the image mask
- Click Rectangular.
- Draw a rectangle around the floor plan excluding the title block and border.
AutoCAD Raster Design toolset hides areas of the image that are outside the rectangle.
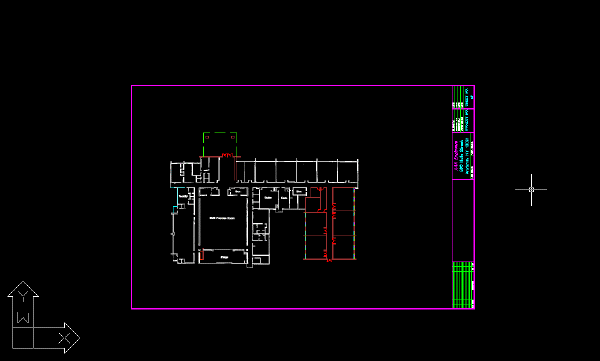
Click to view the drawing with the mask defined.
Turn the image mask off and on
The mask boundary is an AutoCAD object that you can move, stretch, scale, and erase.
- Select the rectangular mask boundary, then right-click and click
Enable from the shortcut menu to turn off the image mask.
AutoCAD Raster Design toolset displays the entire image.
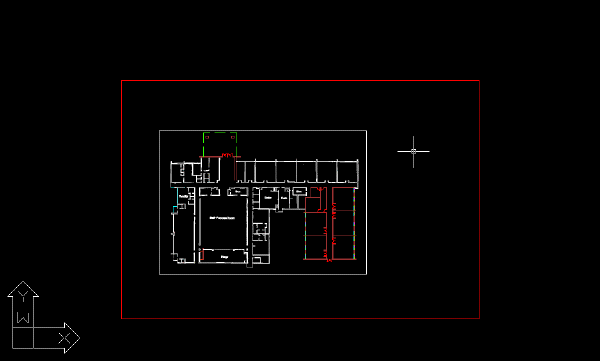
Click to view the drawing with the mask turned off.
- Select the mask boundary, right-click, and click
Enable to turn the image mask back on.
Convert the image mask to a clip and hide the mask boundary
- Click
Raster menu MaskConvert to Image Clip.
Converting the image mask to an image clip allows you to use the IMAGECLIP command options to turn the clip off or on, change its boundaries, and delete the clip.
- Select the mask boundary and press Enter.
- Right-click and click
RasterShow Image Frames to hide the clip boundary.
Insert a vector title block
- Set 0 as the current layer.
- Use the INSERT command to open the Insert dialog box.
- Browse to the \Tutorial4 folder, and insert the drawing file Title.dwg, using the default insertion parameters, as follows:insert
- Insertion Point: 0,0,0
- Scale: 1,1,1
- Rotation: 0
- Freeze the layer named
TU_border.
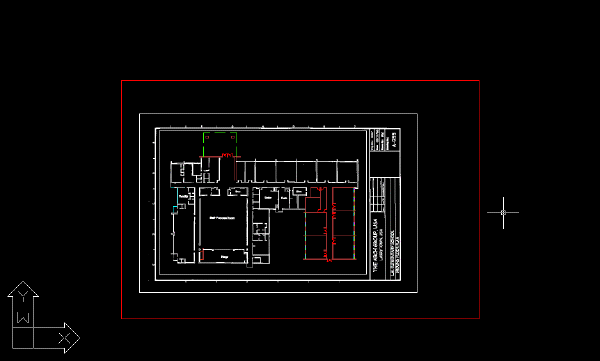
The following example shows how the drawing should appear after you turn on the image mask and insert a vector title block.
You can annotate the floor plan, complete the title block, and plot the drawing.
Click to view the drawing.
- Close the drawing without saving changes.