Creating a deployment
Applications require you to create a deployment. A deployment is an installer image designed to deploy across multiple seats from a centralized network location. Once the deployment is created, the ETO Deployment Configurator is used to finalize the deployment and hide customizations in previous steps. A further step of creating a stand-alone installer for distribution is necessary when a network deployment is not planned. Deployment masters are stored and revised as needed.
Once the application content is ready to deploy, follow these steps to create your deployment:
- Launch the Autodesk Install Framework from the cdimage folder in the Inventor ETO Developer installation. Note: This folder contains content similar to a normal installer containing a Setup.exe.
- Select the Create Deployment option.
Create Deployment dialog box
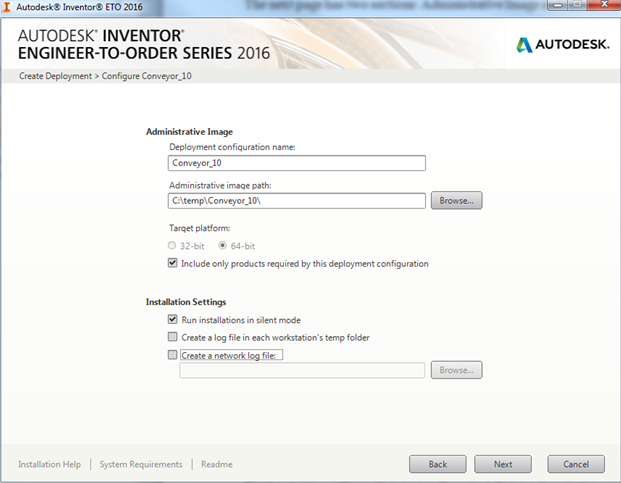
Administrative Image
- Deployment configuration name: Required. Enter a descriptive name for the deployment. Do not include spaces or special characters. Make your description short and descriptive. Version deployments to differentiate them from later deployments of the same application. The end user cannot view the settings after installation. The Deployment configuration name is the Project name used in the ETO Deployment Configurator.
- Administrative image path: Required. Enter a URL the end user can start the deployment installation from. It is not required to use a network location; created shortcuts contain this location. A C:\temp\mydeployment\ location does not work when run by the end user. When planning to distribute a location that is not shared on a network (ZIP file), use the local location. Follow the instructions in Distributing the Installer. The chosen location entered must be accessible or you cannot proceed.
-
Target platform: The Target platform cannot be changed. All ETO applications are 64 bit.
Select the Include only products required by this deployment check box.
Installation Settings
- Run installations in silent mode: Silent mode displays a minimal UI to the end user during the install process. Only the Cancel option is available during installation. When Cancel is selected, no branding displays to the end user during installation, but displays during uninstall and repair.
- Create a network log file: Write Installation logs to a network location or locally on the end-user computer to collect installation logs. For a network, your location is chosen. If you are not deploying with a network, clear the Create a network log file check box.
The next page requires you to accept the licensing agreement. Accept this agreement as the developer or distributor of this application. Select I Accept and Next.
Enter the serial number and product key of the distributed product into the fields on the Product Information page.
Product information
Application files are specified in the next page.
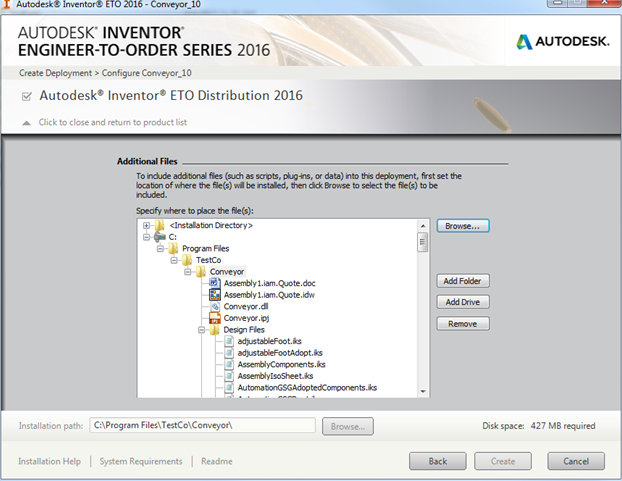
The application files are added to the drop-down menu under the ETO product.
When creating a deployment, add content to the ETO installation. Do not alter existing ETO content.
Add files and folders to create a product folder structure. You cannot copy entire folder structures from the interface. Create each folder individually. Select multiple files when browsing to add files. Select the Up Arrow to close this window.
The default installation path is, C:\Program Files\Autodesk. Change this path to point to the location where your working application resides on the computer you are developing on. Changing this path ensures the values within the. ETO file point to the correct installation location on the target computer.
Use the include additional software table to run programs after installation. EXE or MSI files are run with the installation.
Select Create to create the deployment.
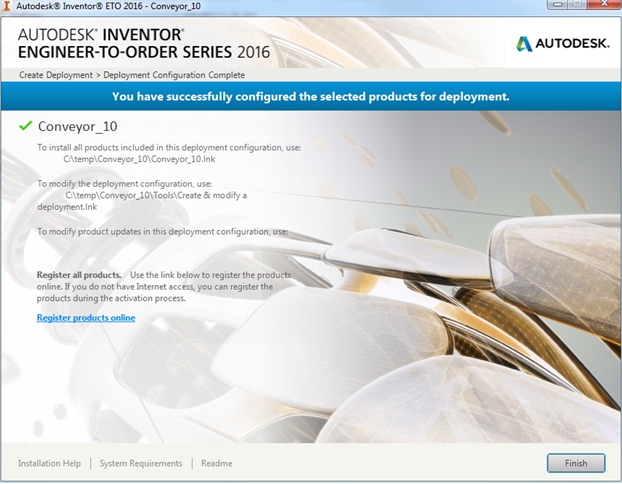
Once a deployment is created, to create or modify the deployment settings:
- Navigate to the deployment location and open the Tools folder.
- Execute Create & Modify a Deployment.
- Select from one of the options displayed in the dialog box:
- Create a deployment based on the settings in the previous deployment.
- Modify the existing deployment.
For more information, contact ETO support by posting questions to the Inventor ETO community forum.