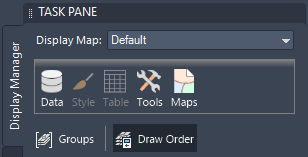
Display Manager organizes the data in your map into layers, which you can display and style independently.
To add a feature layer using FDO (Oracle, SDF, SHP, WFS)
To add a drawing layer
To add a raster or surface layer
To create a group
- In Display Manager , click Groups.
- In
Display Manager , click
Data
 New Group.
- To change the group name, select the group then click the existing name. Type a new name and press Enter.
- Drag layers into the group.
Note: Until you use the
Draw Order view to specify a draw order,
AutoCAD Map 3D toolset uses the
Groups order as a default draw order for the map. Once you use the
Draw Order view, changes in the
Groups view do not affect the draw order.
To change the draw order
- In
Display Manager , click
Draw Order if needed.

- Drag layers up or down to change their display order.
Items at the top of the draw order are drawn on top of items below them on the list.
To change the thumbnail style for a drawing layer
- Select the layer.
- In Display Manager , click the Style button.
- On the
Display tab of the
Properties palette, next to
Thumbnail Preview, select the style of thumbnail to use.
For example, select the polyline icon to display an icon of a wavy line, or choose the polygon icon to display hatch or fill.
This setting affects both the Display Manager layer and the legend for this map.